Using the Product Import Wizard
The Product Import Wizard is used to import tab delimited, comma delimited, or any other specified delimited text file.
Some of the vendors that you purchase products or services from may provide you with a file that contains their price list. These files are typically formatted in many different file formats. QuoteWerks can import files that are in a delimited text file format such as tab-delimited, comma-delimited (CSV), or user specified character delimiter. If the file that your vendor has provided you with is formatted in a format other than the format that QuoteWerks supports, you can still import your data into QuoteWerks; you will just need to prepare the data first.
|
For ease of import your import file should have headings that generally map to fields in the QuoteWerks system. It is recommended that you have a Manufacturer Part Number, Description, and Cost column at a bare minimum.
1. Navigate to the Import Products page by selecting [Setup], then [Import Products] on the left toolbar.
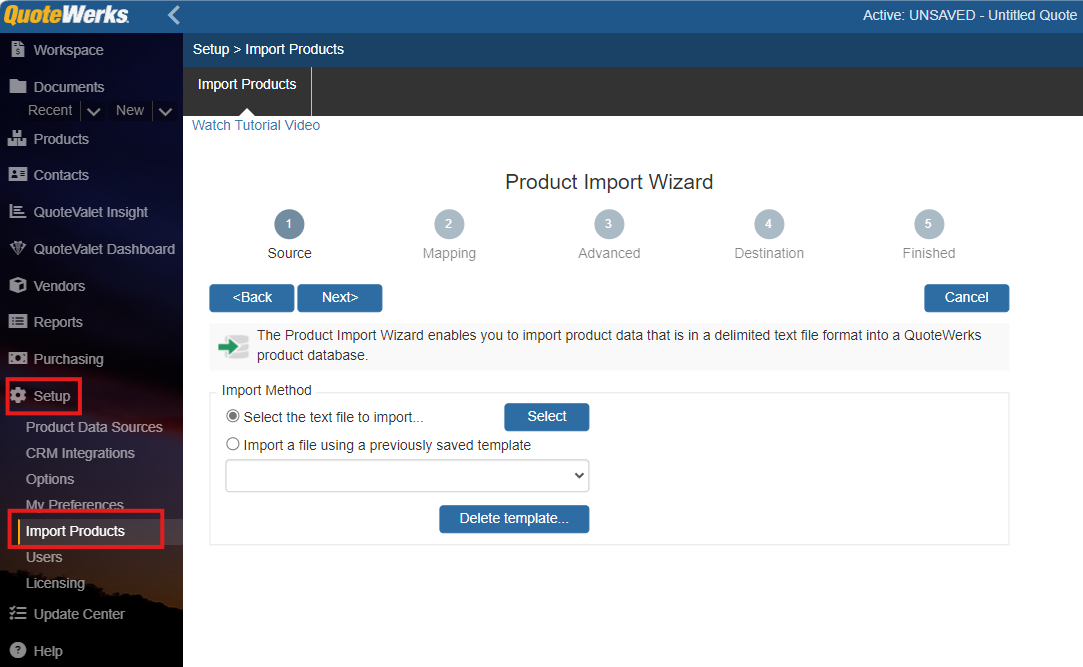
Select the text file to import...
You will begin the process by selecting the text file that you wish to import. You can select the file manually, or select a template that you saved from a previous import.
After you have selected the text file, QuoteWerks will attempt to determine if it is comma or tab- delimited. If a comma or tab delimited text file is not detected, QuoteWerks will then default the delimiter type to the “Other…” option where you can manually specify a different delimiter.
QuoteWerks will also attempt to determine how many columns of data there are in the text file. QuoteWerks will display the delimiter and number of columns that it found on this window. If you believe that QuoteWerks did not correctly detect the settings, you may change the settings.
Import a file using a previously saved template
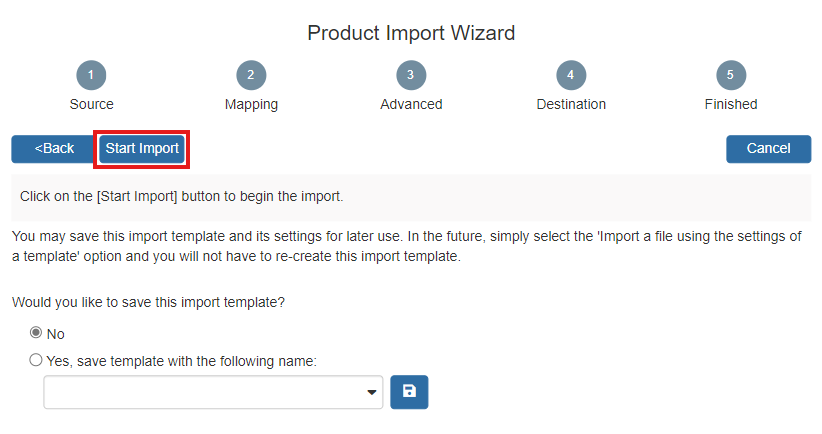
There is an option to load the wizard with settings from a template that was previously created. After loading a template, you will only need to advance through the wizard to the Start Import screen and click on the [Start Import] button and the import process will begin using the settings from the template.
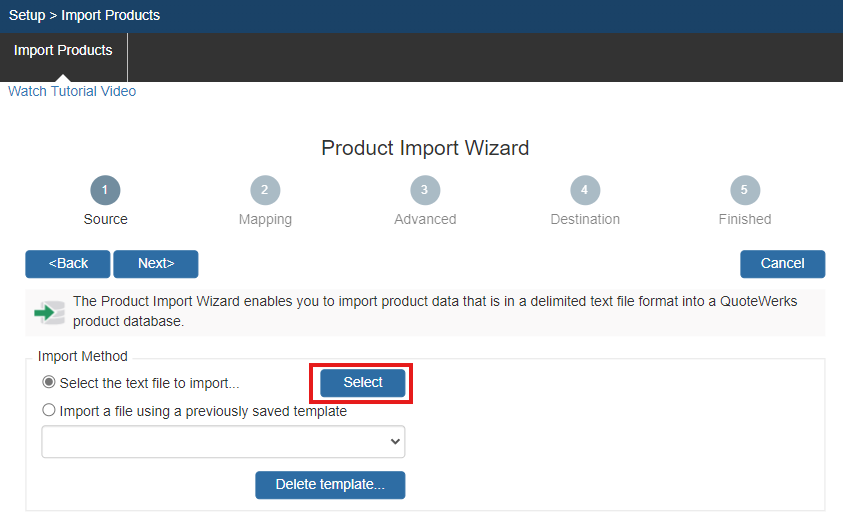
2. Click on Select to choose the file you would like to import. Alternatively you can import using a saved template. Once selected, click [Next].
3. This will bring you to the mapping screen. Here you will want to use the drop-downs on the right to map fields from your imported document to standard fields in the QuoteWerks database. Once complete click [Next].
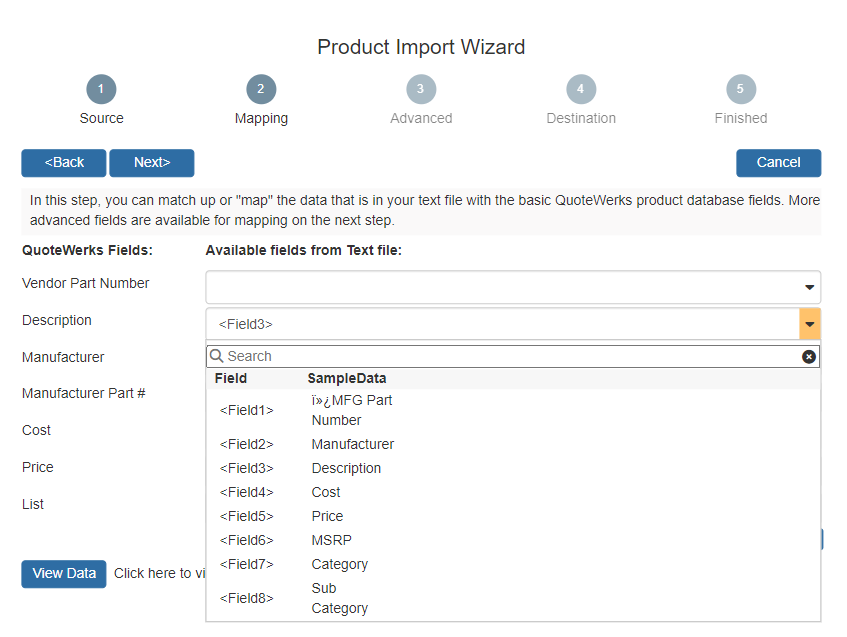
On this step, you will tell QuoteWerks how the columns of data in the text file will match up with the fields in QuoteWerks that are used to track part numbers, prices, etc.
For example, click on the list box next to the “Vendor Part Number” label to select which column of data in the text file should be placed into the “Vendor Part Number” field in QuoteWerks.
When you click on the drop down list box, you will notice sample data from the text file next to each column number. This is provided to help you determine which text column you will want to import the data from for this field. QuoteWerks samples the first 20 rows of data in the text file. Use the up and down arrows on this window to change the row used for sample data that shows up next to the column number.
|

|
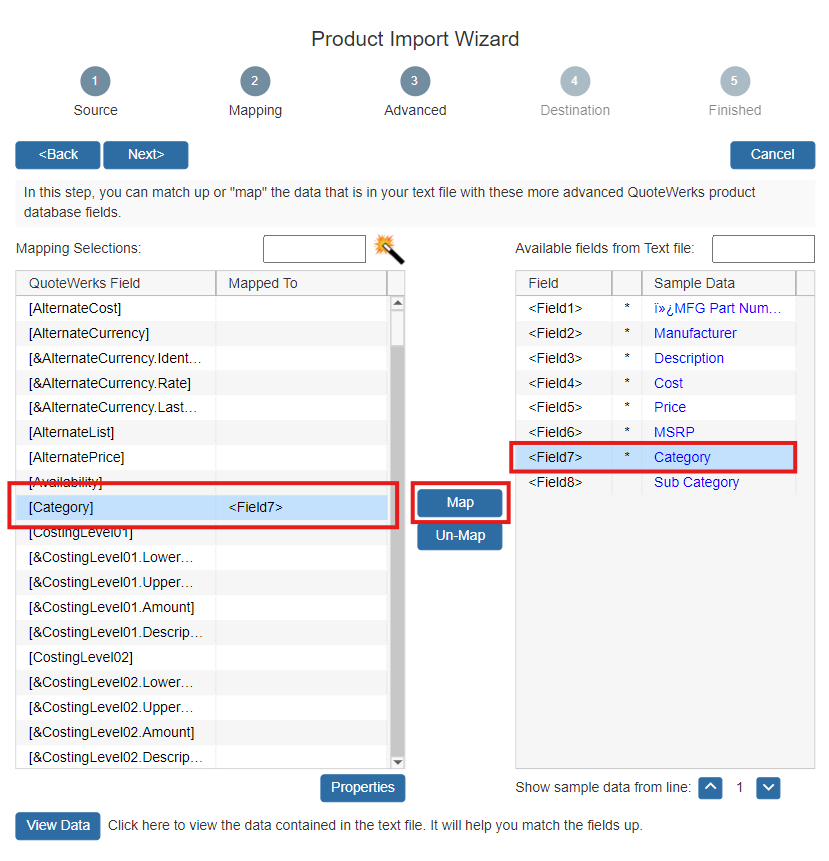
4. The Advanced page is where you set up advanced mapping. For any fields you would like to map you will need to select the QuoteWerks field on the left, then the Field from your document you would like to map it to on the right, and select [Map]. You can see below that we have mapped the QuoteWerks "Category" field with <Field 7> (Category) on the right. Once you have completed your advanced mapping click [Next].
5. On this step you select the QuoteWerks native product database that will store your imported data. The drop-down list will contain the native product databases that you have created.
|
To have QuoteWerks create a new native product database to store the imported products, select that option from the drop-down list.
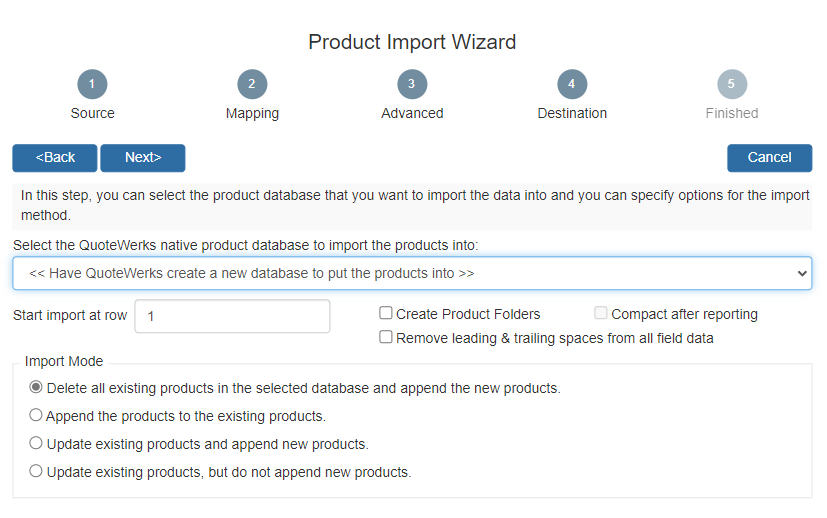
Import Mode
Read on to learn about the different import modes.
Delete all existing products in the selected database and append the new products
Select this option to delete all the existing products in the product database before beginning the import of the new products. This feature is used when you receive a product database update every month, and you want to remove the old product information, and retain only the newest product information. Keep in mind that if you have made any changes to the products that already exist in the database, deleting them will cause you to lose these changes. If you use the product folder features, the folder information will be lost.
Append the products to the existing products
Select this option to only add the products from the text file into the product database. It does not check to see if the products that you are adding already exist. If the product already exists, you will have duplicates.
Update existing products and append new products
Select this option to update products that already exist in the database, and add the products that it does not find in the database. Select the column in the text file, and the database field that should be used to identify the matching products. You can also select which of the mapped fields you would like to update. This allows you to update only the price for example of existing products, for products that do not exist, they will be added, and all of their fields will be updated. This mode is particularly useful in cases where you have received a list from a manufacturer that contains all 6000 of their products and pricing. You have previously imported all 6000 of these products into your QuoteWerks product database. Now, 3 months later the manufacturer provides you with an updated list of their products and pricing and now they offer 6500 products. Using this feature, you can update the prices of the existing 6000 products in your QuoteWerks product database and you can add the 500 new products now contained in the update manufacturer price list.
Update existing products, but do not append new products
Select this option to update products that already exist in the database. If a product does not exist in the database, then do not add it. Select the column in the text file, and the database field that should be used to identify the matching products. You can also select which of the mapped fields you would like to update. This allows you to (for example) update only the price field of existing products. This mode is particularly useful in cases where you may receive a list from a manufacturer that contains all 6000 of their products and pricing. However you may only sell 1000 of their products and therefore you only have these 1000 products listed in your QuoteWerks product database. Using this feature, you can update the prices of your 1000 products.
Start Import at Row
Often, the first row of data in delimited text files contains the column titles of the data that is contained in these columns. Using this “Start at Row” feature, you can instruct QuoteWerks to only import data starting at for example the second row since the second row will actually be the first row that contains data.
Create product folders
If you have mapped to the &FolderName field and you choose this option, QuoteWerks will create the folder contained in the &FolderName data if the folder does not already exist. Without this feature, you need to manually create the folders and folder trees before you can run an import. See the “Things to know about importing” topic for details on &FolderName.
Remove leading & trailing spaces from all field data
When importing data exported from older database systems the data is often “padded” with space characters at the end of the actual data value. You can use this option to “trim” or remove these extra spaces.
6. The "Finished" step allows you to save this import as a template, which you should consider doing if you expect to do future imports from similarly formatted files. Whether you choose to save as a template or not, once you are ready to move to the next step select [Start Import].
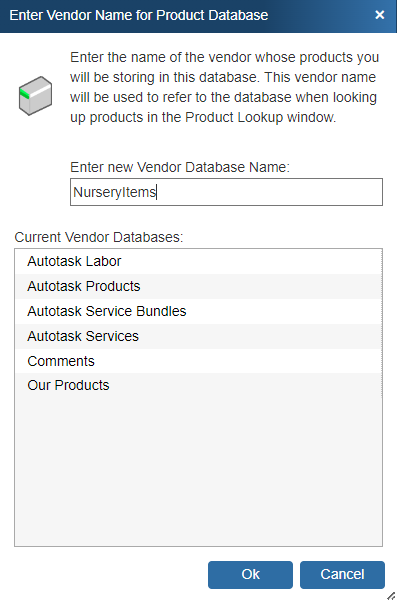
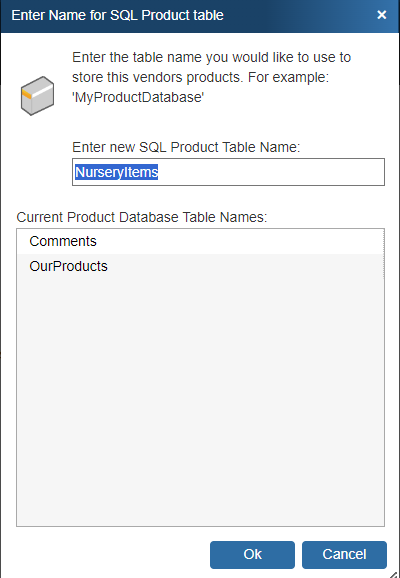
6. The next step in the process will prompt you to name your new Vendor Database and it's associated SQL Product Table. Use a naming convention that is intuitive and represents the database you are importing. On both steps once you have given each a name click [OK].
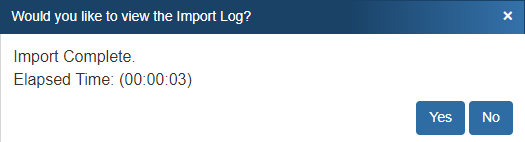
7. The import will process and when complete you will get a notification and option to view the Import Log.
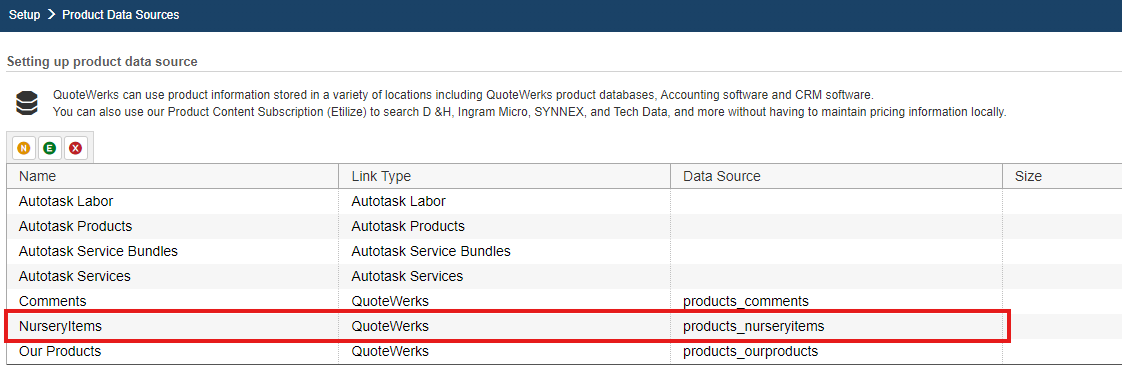
8. With all steps complete you should be confident that the import was successful, however it is always best practice to confirm by reviewing your datasources to ensure everything has been imported correctly. You can do this by navigating to Setup > Product Data Sources. As seen below the new Nursery Product Data Source has been created.
9. One last thing to check would be that the product data source now shows and is selectable in the Product Lookup Window as seen below.
|
