Under the Links tab, you can link external files to a quote. If, for example, you create a Visio diagram or CAD drawing file related to this quote, you can select the file and add it to the Links tab for reference and use. You can also drag and drop files into the Linked Resources list under the Links tab from within Windows Explorer.
With all the external files related to the quote document displayed under the Links tab, finding and opening them to edit or print is very easy — just open the QuoteWerks quote and click the Links tab. You'll notice that all these files are organized for you.
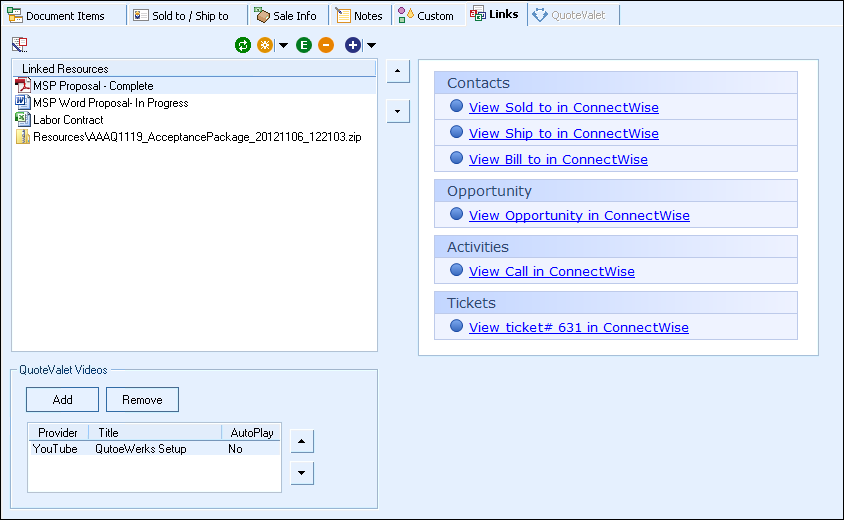
The Links Tab has two sections. The first is the Linked Resources which displays document attachments such as PDFs, Excel sheets, Word documents, etc and are manually attached.
The other section is called Auto-Links in which contacts, opportunities, activities, and tickets are linked dynamically from the CRM/PSA selected in QuoteWerks.
To add a file to the Links tab, click the![]() button. You have two options to select from: Add a File Link or Add a Web Link.
button. You have two options to select from: Add a File Link or Add a Web Link.
Clicking Add a File Link will display a browse window, enabling you to navigate to the location of the file you want to link to the quote. If you choose to add a File Link to the Links Tab and that file is not currently stored in the Resources folder in the QuoteWerks directory, you will be prompted to link directly to the file or copy it to a centralized storage location (\QuoteWerks\Resources) and link to that copy. If you have linked multiple documents, the [Ok for All] button will be available so you can use the same setting for all linked documents.
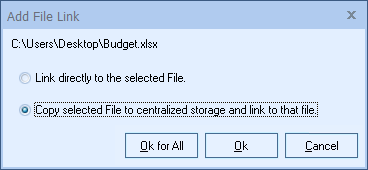
This feature makes it easy for users to share documents with other QuoteWerks users in their organization by automatically having the file copied to a shared location instead of having to move it manually. Users can choose to link directly to the original file however if they do not want to share it or it is already in a shared location.
Additionally, under the Misc Tab of the My Preferences menu option, users can select the option to automatically have the file copied to a shared location when the option "When adding File Link default to option to copy to Centralized Storage". Also, administrators can force the centralized storage option by utilizing the Access Right of "ForceFileLinksAttachModeAsCopy".
Clicking Add a Folder Link will display the browse for folder window, enabling you to navigate to the folder you would like to link to the document.
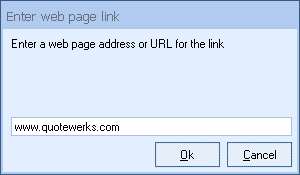
Clicking Add a Web Link will display the Enter web page link window, which provides a box to enter the Web-page URL you wish to link to the quote.
|
|---|
Once you click on the [Ok] button, you'll be prompted to enter a description for the Web link:
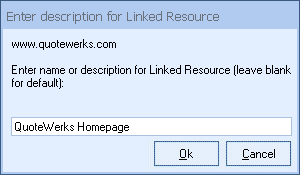
As an example, here you could rename a Web-page link to "UPS Tracking for the Flatscreen TV" rather than the raw package-tracking URL. You can also drag website addresses directly from your Web browser into the Linked Resources list. Double-clicking on the link will launch the Web page in your default browser.
|
Edit Link
Once you've added a link to the Links tab, you can edit its description by highlighting the link and either clicking the ![]() button or right-clicking on the resource and clicking Edit Link:
button or right-clicking on the resource and clicking Edit Link:
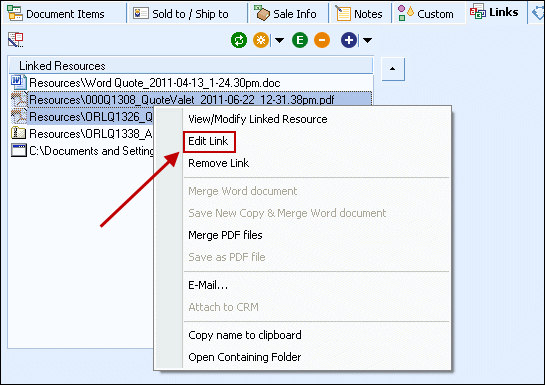
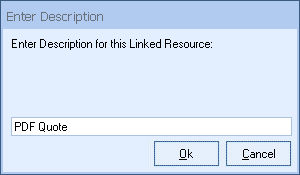
As an example, you could rename the link "F:\VisioFiles\Network Design for ABC Company" to "Network Architecture Design." This won't modify the actual file name in Windows — only the description within QuoteWerks.
View/Modify Linked Resource
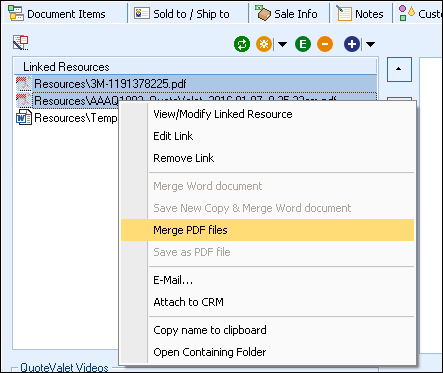
From the same right-click menu described above, you can also choose to View/Modify Linked Resource. This will launch the linked resource (file or hyperlink) in the default program associated with this file’s type. The option to Merge PDF files is also available if you have two or more PDF files selected. To select multiple PDF files, simply hold down the [Ctrl] key on your keyboard while clicking on additional PDF files. For more information on this functionality, please see Misc Tab.
Merging Word documents enables you to merge your Word documents with the current document, if it contains any macros.
For more information, see Merging Word Documents.
Save New Copy & Merge Word document
From the right-click menu, you are able to create a new Word document from a template file:
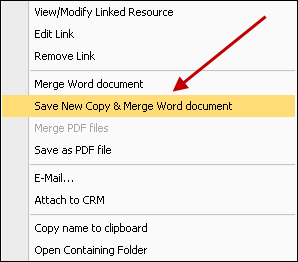
At this point, it is a generic Word template, so you’ll likely want to modify that Word document to be specific to this quote.
When you click this option, QuoteWerks will first make a copy of the selected Word document using the file name you supply, then merge the appropriate QuoteWerks data into the macros embedded in your Word file into the old copy. The benefit of saving a new copy is that the original Word document you modified to associate with this specific quote is unchanged, with all the original merge macros.
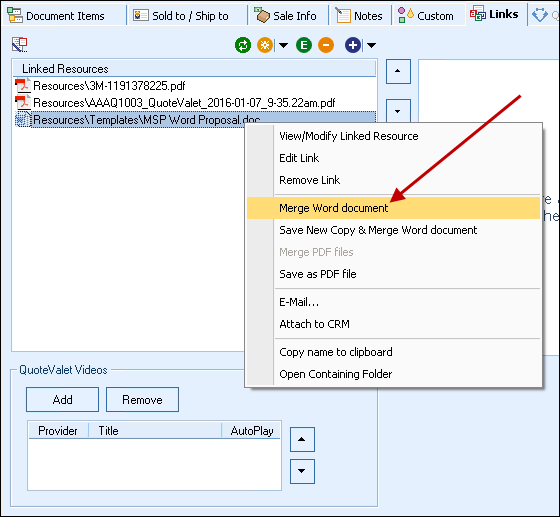
Important: The Merge Word Document feature below will only be available when you hold SHIFT on your keyboard and right-click. This menu option does NOT create a copy of your Word document after merging so only use this feature if you are absolutely sure you will not need to make any adjustments after merging the macros. |
This option will merge the macros into the Word document. This cannot be undone so only use this feature if you will not need to make any adjustments to the Word file. If you think you may have to make a change post-merge, use the "Save New Copy & Merge Word Document" option instead.
The final output of a quote comes from various sources such as cover page, layout file, RTF, Word, or PDF spec sheets, RTF, Word, or PDF literature, and RTF, Word, and PDF Linked Resources (File Links). Often this results in many separate PDF files being attached in an email when the quote is being emailed. With this Merge PDF Files option, all the separate PDF files will be merged together into a single PDF when e-mailing a quote or when saving a quote preview as a PDF. All selected PDF formatted Literature, Spec Sheet or Linked Resource files will be added to the end of the primary quote PDF, resulting in 1 PDF instead of several independent files.
You are also able to manually merge PDF files on the Links tab. Select the PDF files you want to merge together, then right click and select Merge PDF files.
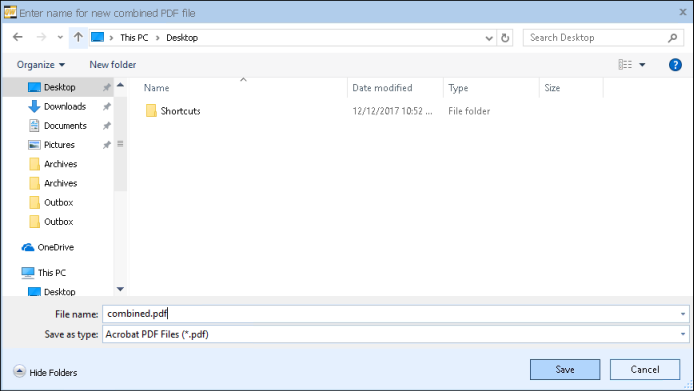
A Save As window will display, providing the option to name the file and choose the location to save it. By default, the file will be named combined.pdf and you can choose the location where you wish to save it.
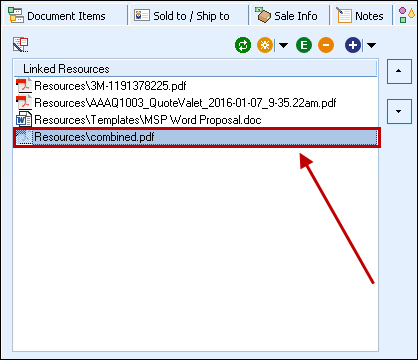
Once the file has been saved, the previously selected PDF files will be merged together and included on the Links tab as a new PDF.
Note that the process of merging PDF files simply combines the file. It does not apply any security settings to the combined file such as the “Make PDF Read-only” option.
From the same right-click menu, you can also choose Save as PDF file to save Word files as PDF files. This option is only available for Word documents, and will convert the Word document into a PDF document.
Copy name to clipboard
From the same right-click menu, you also have the option to copy the link name to the the clipboard, which copies either the file path or the website URL to the clipboard for use in other programs, such as pasting into Windows Explorer, an e-mail, or an instant message. This saves a lot of time, as you don't have to browse to find a file whose name and location you already have.
From the same right-click menu, you can also e-mail a file or multiple files from the Linked Resources list:
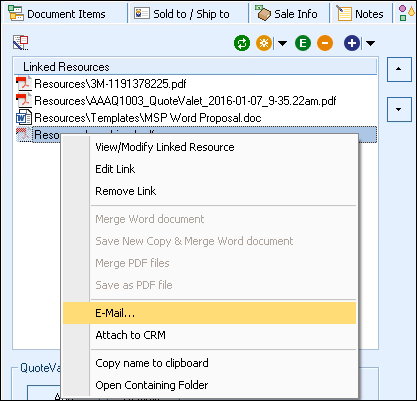
See Sending E-Mails for more information.
Open Containing Folder
Lastly, you can choose to open the folder that contains the file. This is very useful for when you want to see other files that you know are located in the same folder as the linked resource you selected.
Opening the containing folder when a Web link is selected will launch the home page of the website your link refers to. For example, if you've linked a UPS tracking-number URL, the home page of www.ups.com will open.
To remove a file or Web link from the Links tab, select the linked resource and click the ![]() button or press the [Delete] key on your keyboard.
button or press the [Delete] key on your keyboard.
Linked File Templates
In addition to selecting existing files to link to (as described previously), you can also create new linked files using templates. If you click the arrow portion of the ![]() icon, you’ll be provided with a list of available templates you can use to create a new file link:
icon, you’ll be provided with a list of available templates you can use to create a new file link:
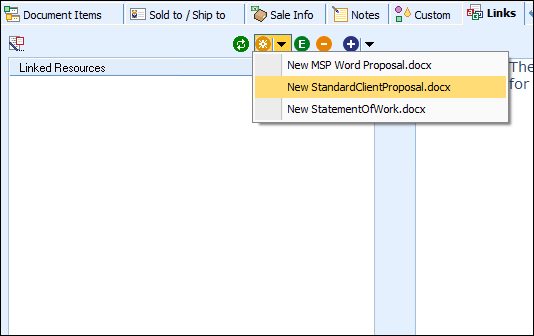
After clicking a template name, you can change the file name before saving.
For example, if you’ve set up a template file called JobCostAndTimeTracking.xls, when you select this file, QuoteWerks will create a copy, let you change the name or assign one to this quote automatically, then add the file to the Links tab.
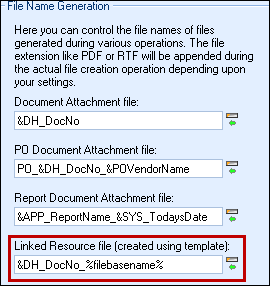
In our example, the JobCostAndTimeTracking.xls file will be copied and named as "AAAQ1001_JobCostAndTimeTracking.xls", where AAAQ1001 is the document number of the current quote. The actual file name of the copied file can be customized, and is determined by the File Name Generation feature. You can specify this name under the Tools -> Options menu > Misc tab.
If you click the yellow star itself rather than the arrow on the ![]() icon, the default template file will be used. The default template file can be defined in several ways.
icon, the default template file will be used. The default template file can be defined in several ways.
First, if only one template file exists, it will be the default. If there are multiple template files, then the first on the list will be the default.
Alternatively, if you want to define a specific template file as your default, you can modify the template's file name to begin with "Default_". For example, if you wanted to use the template InstallationProposal.rtf as your default, rename it to "Default_InstallationProposal.rtf".
|
You must save template files to \QuoteWerks\Resources\Templates. You can have as many template files as you like (so, for example, you can have a different template for every job type). You can create templates for any file type, including Excel spreadsheets, CAD drawings, Visio diagrams, text files, Word documents, and more.
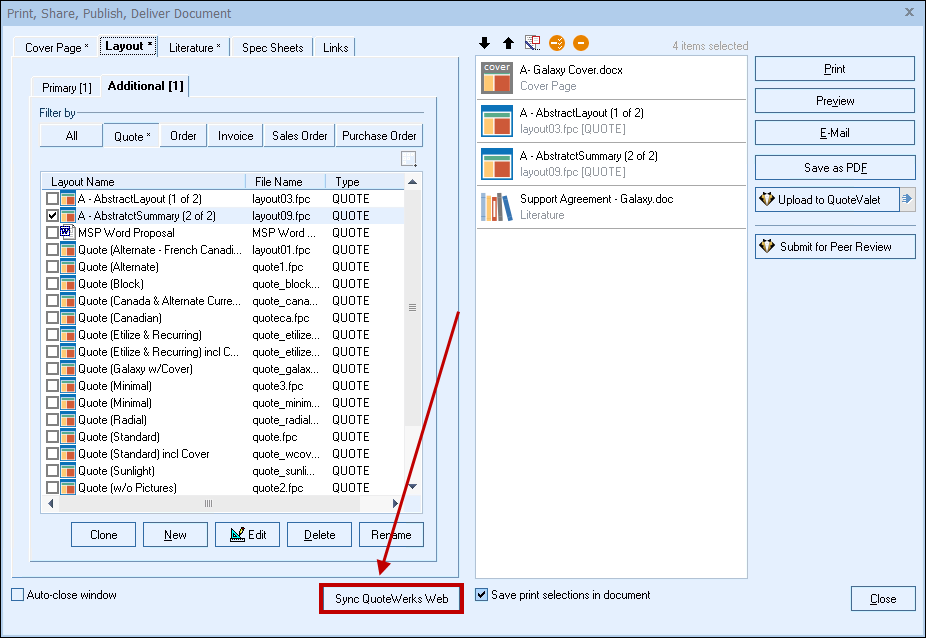
The Refresh Link Status button can sync files up or down from QuoteWerks Desktop to QuoteWerks Web. Use this to synchronize layouts, cover pages, literature, spec sheets, images, lease rate files, and more to/from QuoteWerks Web on the fly. After the synchronization is performed, the File Links list will be reloaded so that you can see any new files as a result of the synchronization process.
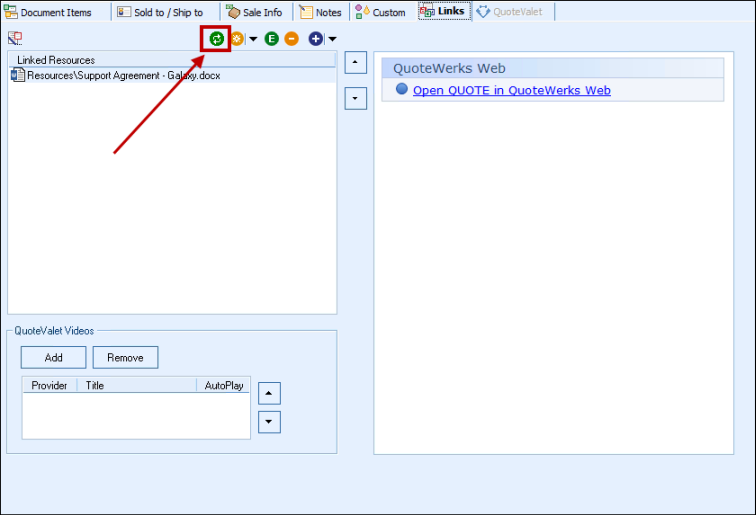
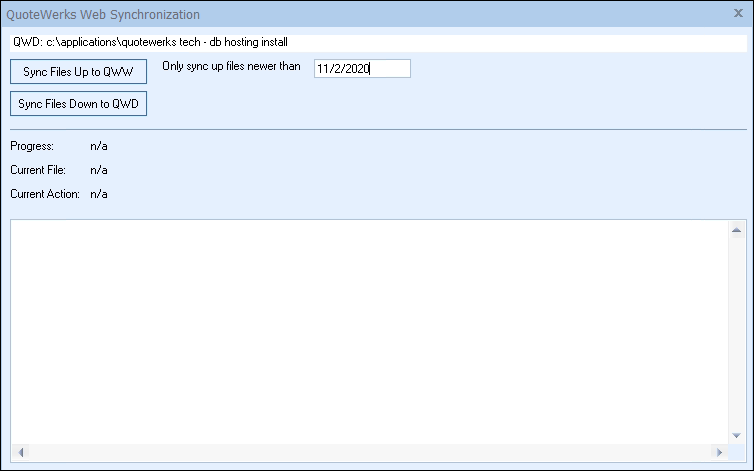
This button is an easy way for users to initiate the synchronization of the files when they need to for QuoteWerks Web. The Misc Access Rights of "CannotUseQuoteWerksWebSyncUp" and "CannotUseQuoteWerksWebSyncDown" have been added as a way to control user access to this feature.
This synchronize and refresh feature can also be accessed with the new [Sync QuoteWerks Web] button on the Deliver window.
The Auto-Links window creates dynamically generated links from the CRM/PSA system and link to specific details from the QuoteWerks quote. These details include linking to the Sold to/Ship to/ Bill to contacts and/or companies, a link to the opportunity in the CRM/PSA, and more. This feature is available for Autotask, ConnectWise, HubSpot CRM, Kaseya BMS, MSCRM, Maximizer CRM Live, salesforce.com, and Zoho CRM.
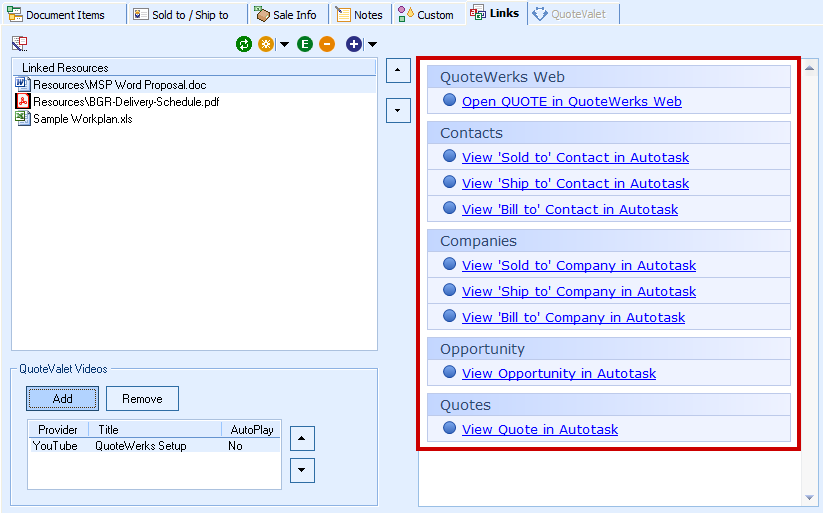
This functionality provides users with an easy way to view the contact(s) from the quote in the CRM/PSA system as well as the opportunity that was created based on this quote, and any activities (such as follow up calls) will be linked under the activities section. ConnectWise users will be able to view any tickets associated with this quote, the Sales Order, and an Agreement if QuoteWerks created them.
|
QuoteValet Videos
For information on using videos in QuoteValet, please see the QuoteValet Videos help file topic.
Related Topics: