QuoteValet accepts payments (deposits, partial payments, final payments, etc.) through over 80 payment gateways, including Authorize.net, QuickBooks merchant services, and PayPal. Additionally, for QuickBooks users, payments received by QuoteValet can be imported as a customer payment in QuickBooks and automatically applied to the customer that made the payment.
|
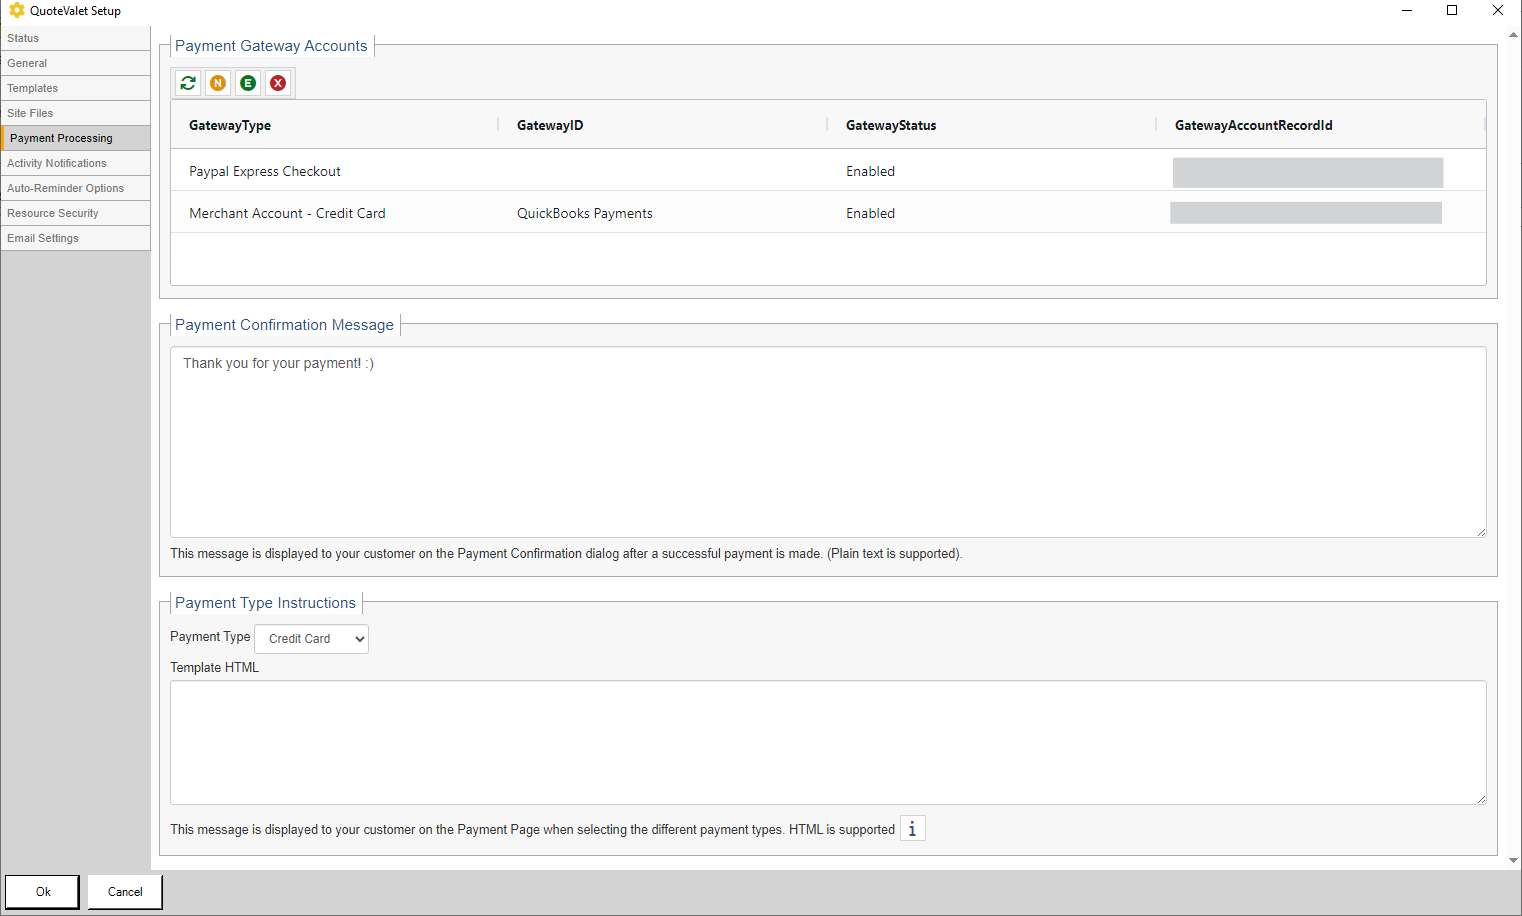
Payment Gateway Accounts
There are four buttons on the Payment Gateway Accounts menu. The buttons perform the following functions:
 : Refreshes the Payment Gateway Accounts list with all the gateways that have been created
 : Creates a new payment gateway for QuoteValet. This is where you will choose which gateway you would like to use. You may choose multiple gateways.
 : Deletes existing gateways from the QuoteValet server:
 : Edits existing gateway information from QuoteValet, such as new ids, passwords, etc.
Creating New Payment Gateway
To create a new payment gateway click on the  button. Once clicked, the “QuoteValet Payment Gateway Accounts” window will open. There will be a drop-down so you can select the payment gateway you would like to setup. The four types of payment gateways available include Credit Card, EChecks (ACH), and PayPal.
You can also click on the credit card icon and PayPal icon to choose one of those payment options.
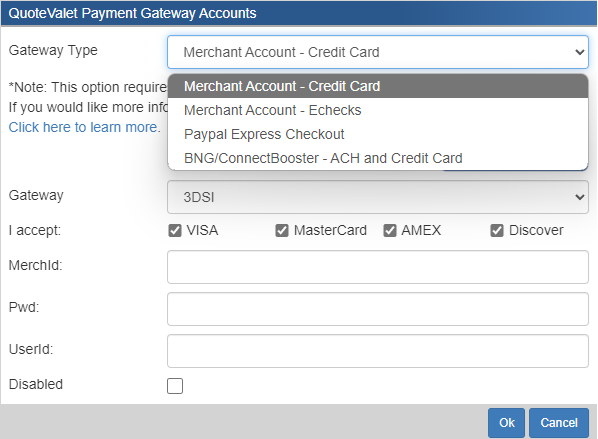
Merchant Account – Credit Card
The credit card option will provide you with a drop-down box with the supported credit card vendors in QuoteValet. Once you have selected the vendor you wish to use you will need to fill in the appropriate fields such as the Gateway, Login, Passwords, etc. You can also specify which credit card types you accept (VISA, Master Card, American Express and/or Discover).
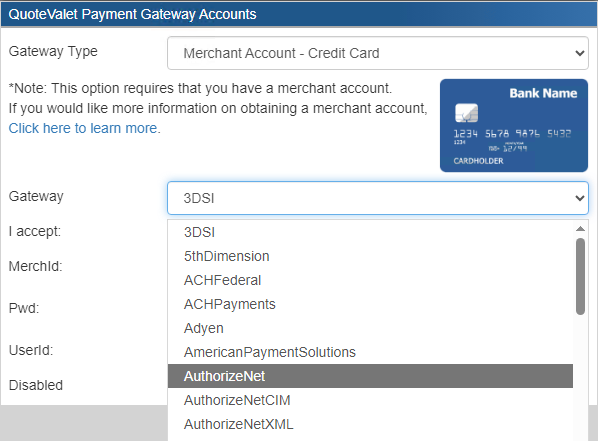
For instructions on how to set up the Authorize.net gateway see:
•Authorize.net Payment Gateway Setup
The ECheck option will provide you with a drop-down box with the supported ECheck vendors in QuoteValet. Once you have selected the vendor you wish to use you will need to fill in the appropriate fields such as the Gateway, Login, Passwords, etc. You may need to contact your merchant to add ACH support if you have not activated it on your account.
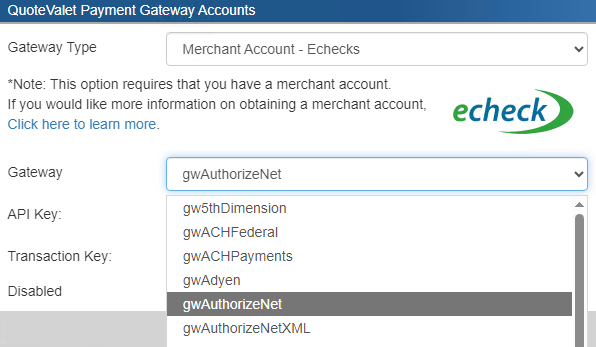
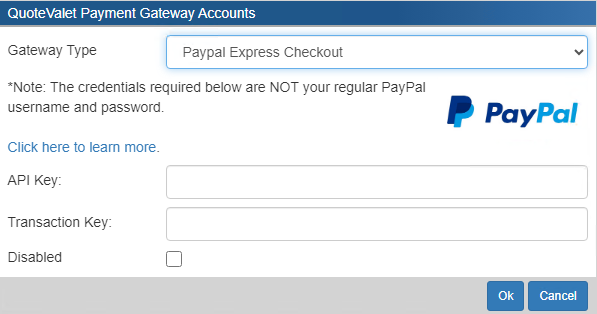
PayPal Express Checkout
The PayPal Express Checkout option will allow you to use your PayPal account to accept payments. You will need to fill in the API Username, API Password, and API Signature.
Note: The credentials required are NOT your regular PayPal Username and Password. They are the credentials for the API. Instructions for obtaining the API credentials can be found by following the steps below: |
To obtain your API credentials:
1.Login to your PayPal account
2.Click the Gear at the top -> Profile and Settings.

3.Click on My Selling Tools -> API Access ('Update' Link on right)

4.Under NVP/SOAP API Integration, select "Request API credentials".

5.Select "Request API Signature" option and click on the [Agree and Submit] button.

6.Click on the "Show Link" option under each credential to view them and copy and paste these into the Payment Gateway form.
Payment Confirmation Message

The Payment Confirmation Message is the message that will be displayed after a successful payment is made. Type into this message to set your default and then click [Save].
Payment Type Instructions

The Payment Type Instructions are displayed on the payment page. These instructions enable users to set a specific message when selecting a payment option. For example, if you wanted to give the customer the option to pay by check, you could create a specific set of instructions that display when the customer selects the payment option of "Check". This could include who to mark the attention to on the envelope as well as confirm the proper address to send the check too. For wire transfer, you could include your wire transfer account information.
For instructions for setting and using the payment options on documents, see the following topics:
•Setting default payment options for documents
•Adding, editing, and customizing payment options
Next, see Activity Notifications Tab.
Related Topics: