|
Navigation: QuoteWerks Web > Using QuoteWerks Web > The Quote Workbook > QuoteWerks Web Document Items Tab Grid Toolbar |
Scroll Prev Top Next More |
The Grid Toolbar contains a variety of features, integrations, and shortcuts that can be used in conjunction with the other features on the DocumentItems tab.

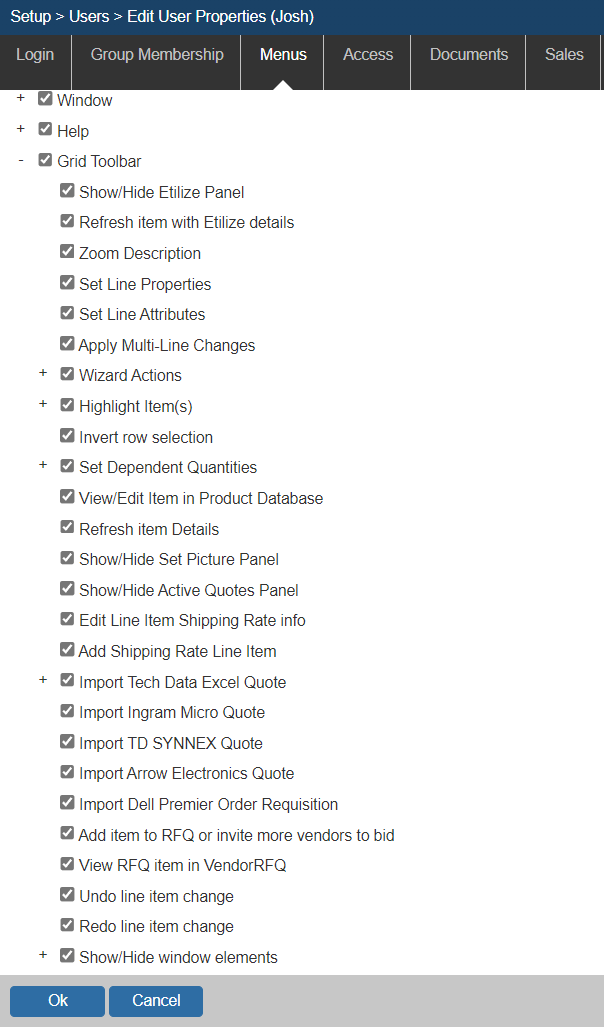
Note that you can determine which of these Grid Toolbar icons are available to a user by navigating to Setup -> Users -> Edit user Properties-> Menus. Here you can select or deselect any Grid Toolbar icons you would like to show/hide from the selected users.
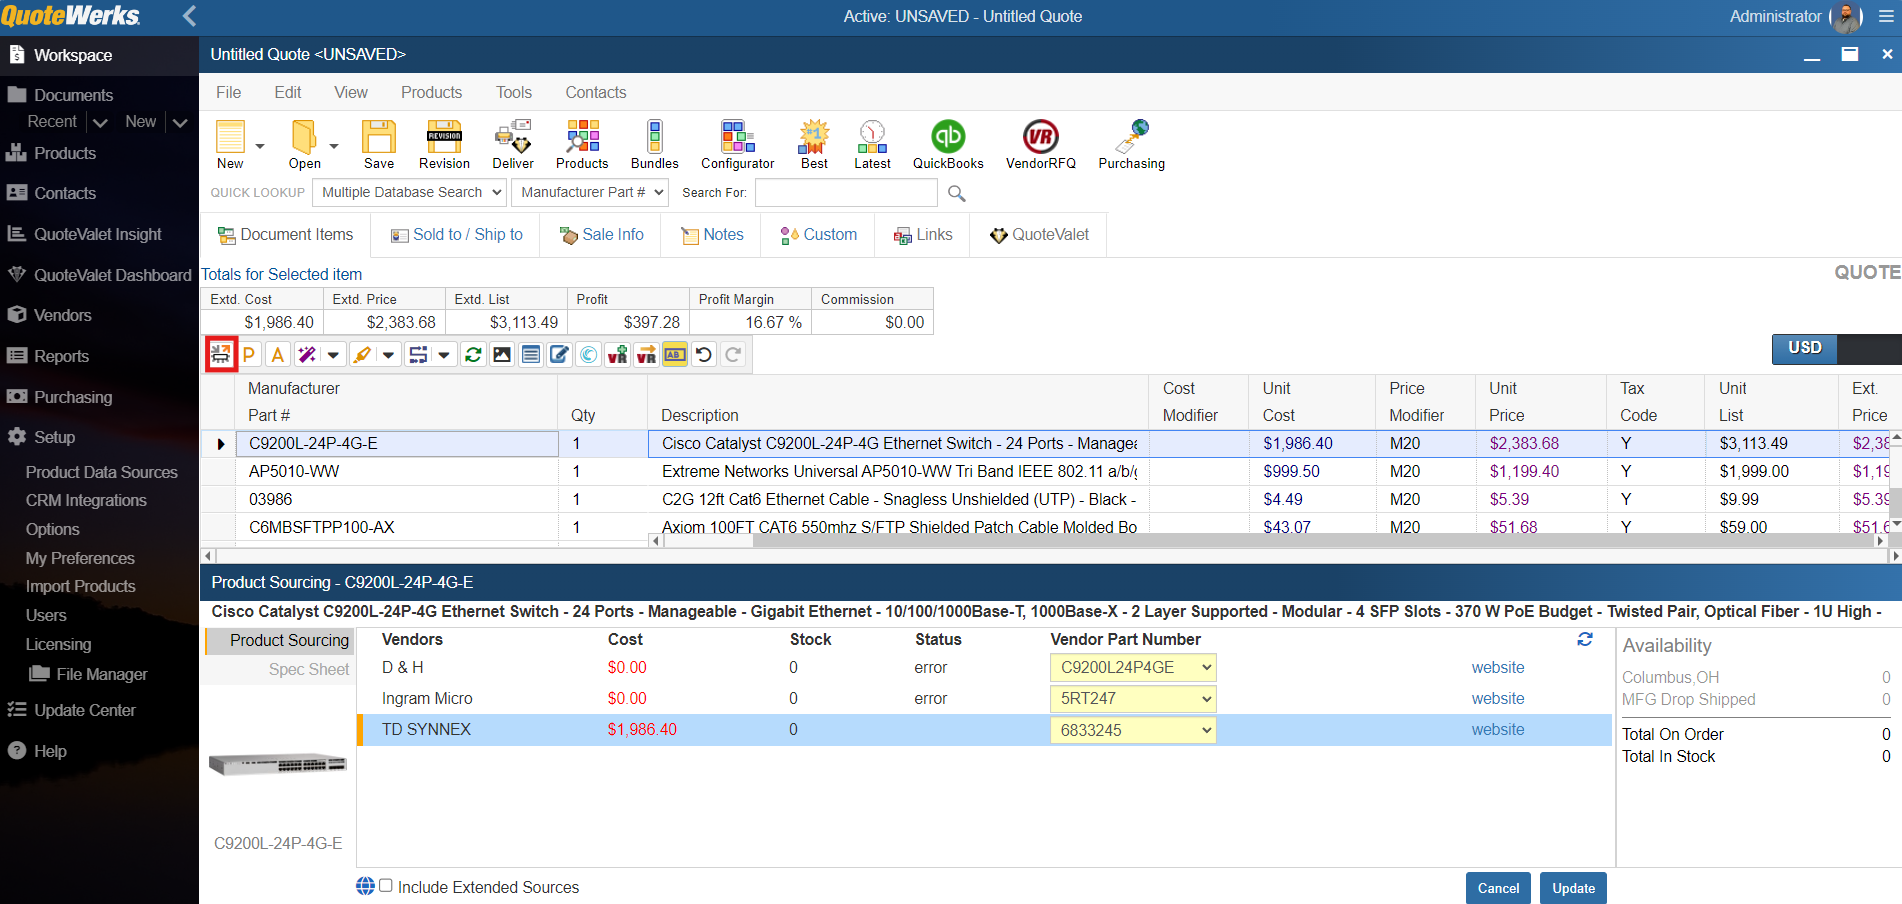
Show/Hide Product Sourcing Panel 
Show/Hide Product Sourcing Panel The show/hide Product Sourcing Panel icon will open the Product Sourcing panel on the Document Items tab and let users update, change, and select information from Etilize, Local Product Databases, Linked Sources, and VendorRFQ. This allows users to use these integrations on the DocumentItems Tab for any items that have the manufacturer part number and manufacturer included for items on the tab. When this icon is selected, the Product Sourcing panel will display below the selected line item on the DocumentItems tab to allow for any changes or updates.
For more information on using the Etilize integration, see our Using the Product Content Subscription topic. |
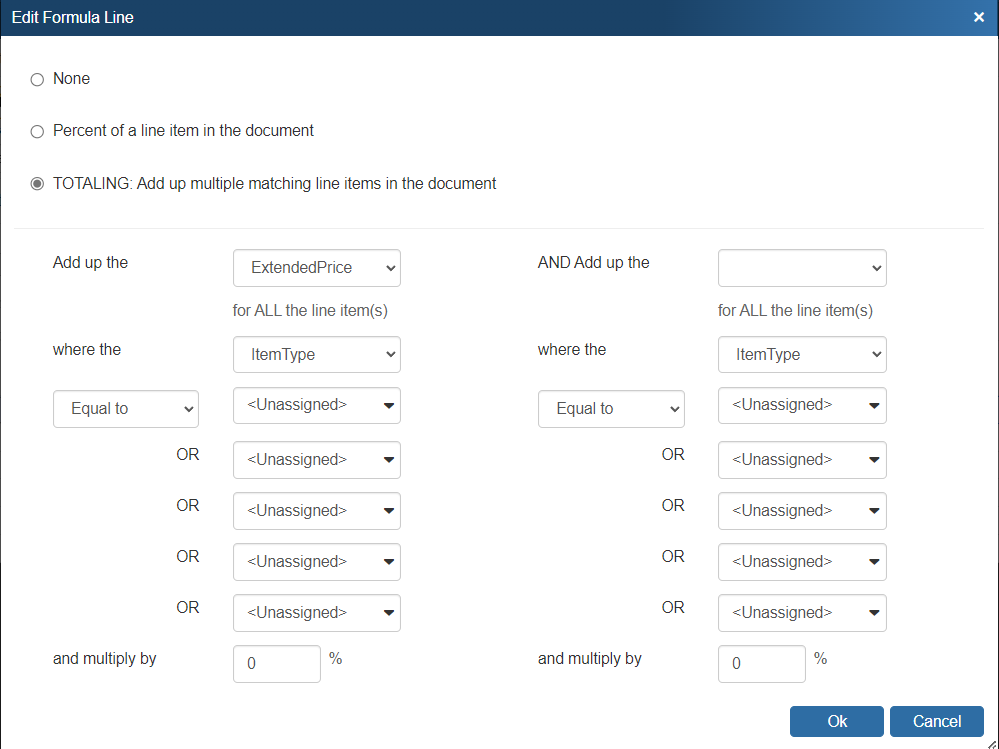
The P icon directly above the line-items list under the Document Items tab displays unit-price properties for a selected item — the same window that appears under the Edit -> Edit Product/Service properties... menu.
The P icon allows you to adjust the unit price formula of a product or service without having to right-click, or click the Edit menu.
See Formula-based Unit Pricing for more details on the Set Unit Price Formula window.
|
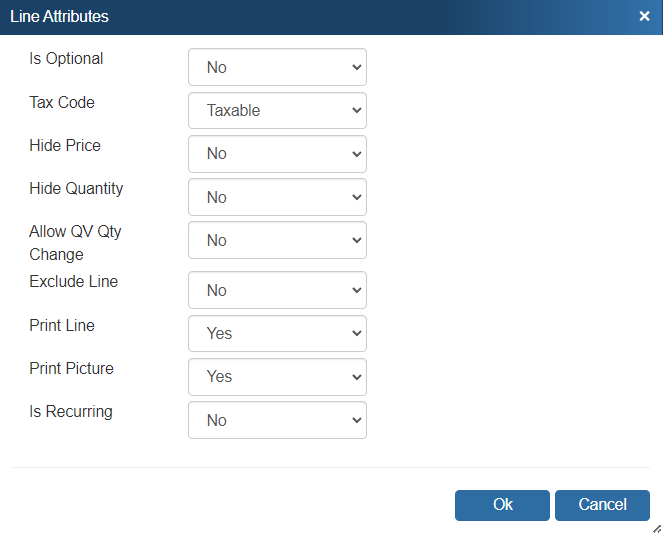
The A icon directly above the line-items list under the Document Items tab displays the Line Attributes window — the same window that appears under the Edit -> Edit Line Attributes... menu, or when you double-click the row selector for a line item in your quote (
The A icon allows you to edit the attributes of a specific line item without having to right-click, or click the Edit menu.
See Line Attributes for more details on the Line Attributes window. |
Delete Quantity Zero (0) Line Items 
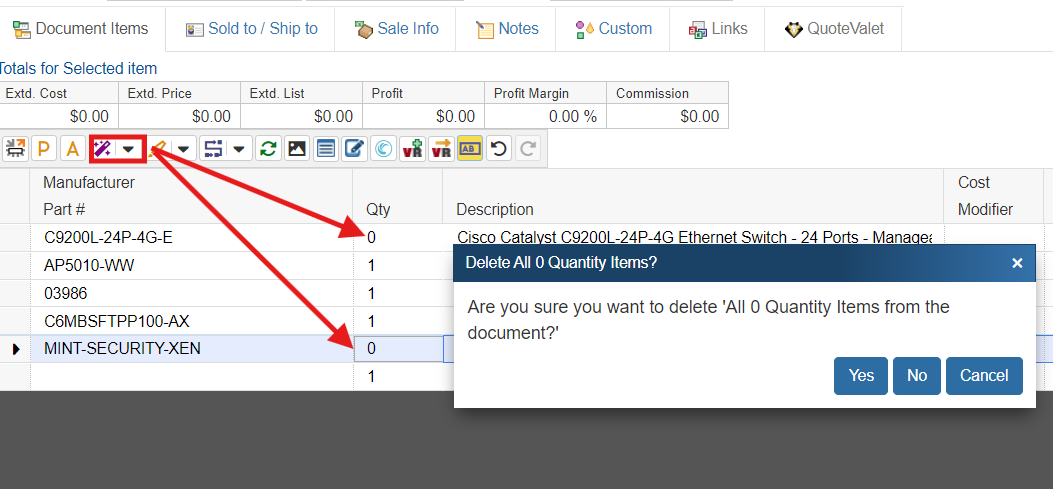
The Delete Quantity Zero Line Items feature makes it easy to delete any items you have on a document with the quantity of zero.
This is really useful to quickly remove any items you are not planning on selling that are on the document and the quantities are set to zero. This feature will also work for Bundles/Groups if the Bundle Header has a quantity of zero, the Bundle/Group Header line will be deleted along with all of the line items in the group.
|
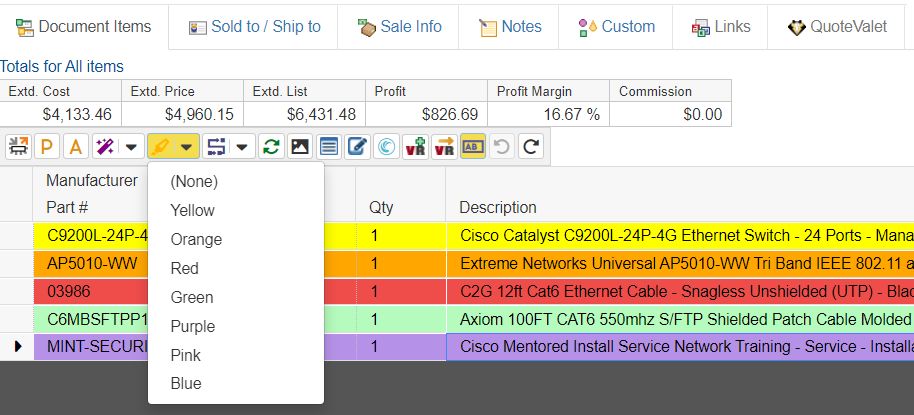
The Highlight Line Items icon will highlight single or multiple selected lines on the DocumentItems tab. Users can choose from seven different colors of Yellow, Orange, Red, Green, Purple, Pink, and Blue. This provides the ability to tag/highlight line items to use as a visual aid such as a line that needs attention, correction, or improvement. This feature can also be used in conjunction with the Notes column to enter notes about what changes need to be addressed. The highlights will only appear on the DocumentItems tab, they will not print on the PDF or be viewable in QuoteValet.
While a line or multiple lines are highlighted and selected on the DocumentItems tab, clicking on the highlight icon Users can also edit the color names in QuoteWerks Desktop. For example, instead of the label reading "Yellow" you can edit it as "Needs Review". This lets users customize the colors to be used in their document so everyone in the company uses the same highlight colors for the same purpose. To change the label for a highlight: 1.Click on Help -> Settings Manager 2.Set "Section" to "System" 3.Click on the new button 4.In the "KeyName" field type HighlightColor1Label to change the label for Yellow (type HighlightColor2Label to edit Orange, HighlightColor3Label to edit Red, etc). 5.In the "KeyValue" field type the new description into that field. In this example, we typed in "Needs Review" 6.Repeat steps 3-5 to edit the other color labels. 7.Close out of the Settings Manager, restart QuoteWerks and your new label should appear.
|
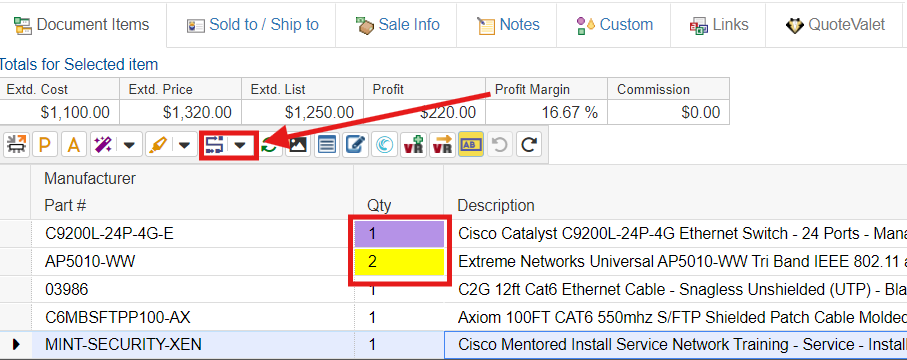
This option will link item quantities between various items on the document. This enables users to "tie" a parent item to a single or multiple children items so users can change the quantity of the parent item and the children quantities are adjusted automatically. This functionality is the basis for manually associating labor to items, but can be used with other items as well. Items can also be set with default dependent quantities by using the Simple Labor tab for the item.
Using Dependent Quantities is a great way to link items together when the quantity of the items needs to stay in sync with one another. You can link as many items together using this feature. The Qty. column on the DocumentItems tab has 3 different colors to identify what type of items are set:
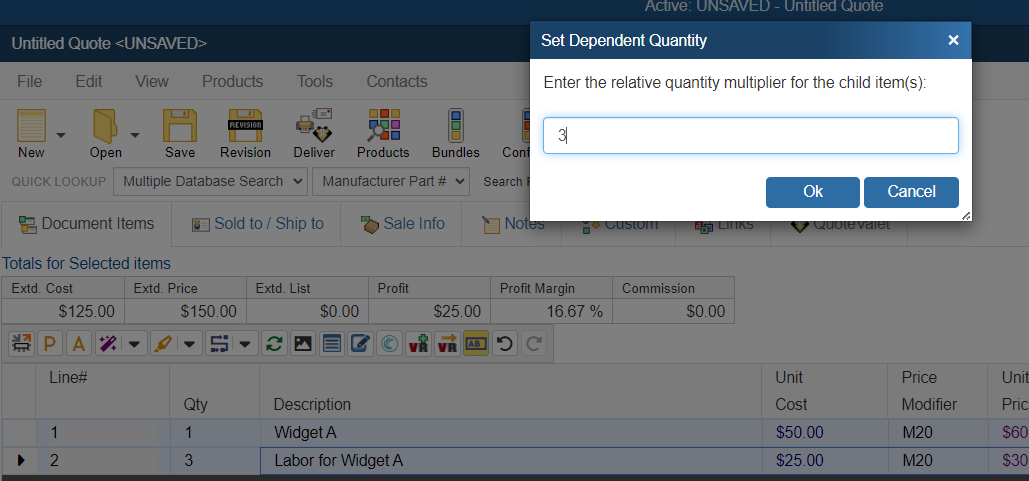
Parent Item Child Item If we then change the quantity of the parent item to 2, the child item's (Labor Item A) quantity will change to 6 automatically. Parent and Child Item For example, if "Widget B" was set as a child to "Widget A" and a Parent to "Labor for Widget B", when you change Widget A's quantity, it will adjust the quantity of Widget B and Labor for Widget B automatically. Setting Dependent Items To set an item or multiple items as dependents follow these steps: 1.Highlight at least two items. The first item highlighted will be the default Parent item. So be sure to highlight which item you would like to set as the Parent first. In the example below, "Widget A" was highlighted first. 2.With your items highlighted, click on the [Set Dependent Quantity] icon 3.You will be prompted to set the relative quantity multiplier. This is the ratio you wish to set between the parent and child item(s). For example, if you want the parent item to have a 1:3 ratio to the child item(s), then you would set the relative quantity to 3. So if the Parent item has a quantity of 1, then the child item(s) will have a quantity of 3. 4.Once the relative quantity is set, the quantity columns will update with the new totals (if applicable) and the identifying color. 5.Any changes made to the Parent item (in this example Widget A) will automatically re-calculate the quantity for the child item (Labor for Widget A in this example). So if the quantity of Widget A is changed to 3, the Labor for Widget A item will change automatically to maintain the 1:3 ratio that was set.
Unlink Dependent Quantity When using the Dependent Quantity feature, if you need to unlink a child item from a parent item, you can use this option to unlink it. Additionally, manually changing the child item's quantity will also unlink it from the parent item. When using the Dependent Quantity feature, you may have multiple parent items with multiple child items. This can make it difficult to know which parent item is updating which child item(s). To make it easier to identify which parent items are associated with which child items, you can simply highlight any child item and on the drop-down menu for the [Set Dependent Quantity] icon Highlight Dependent Quantity Children When using the Dependent Quantity feature, you can easily identify the child items associated with a particular parent item. Highlight the parent item that you wish to view the child items for and on the drop-down menu for the [Set Dependent Quantity] icon
|
For information on refreshing item details with data from your product sources, please see the Refresh Item Details topic.
|
Selecting Pictures/Videos for Items Manually 
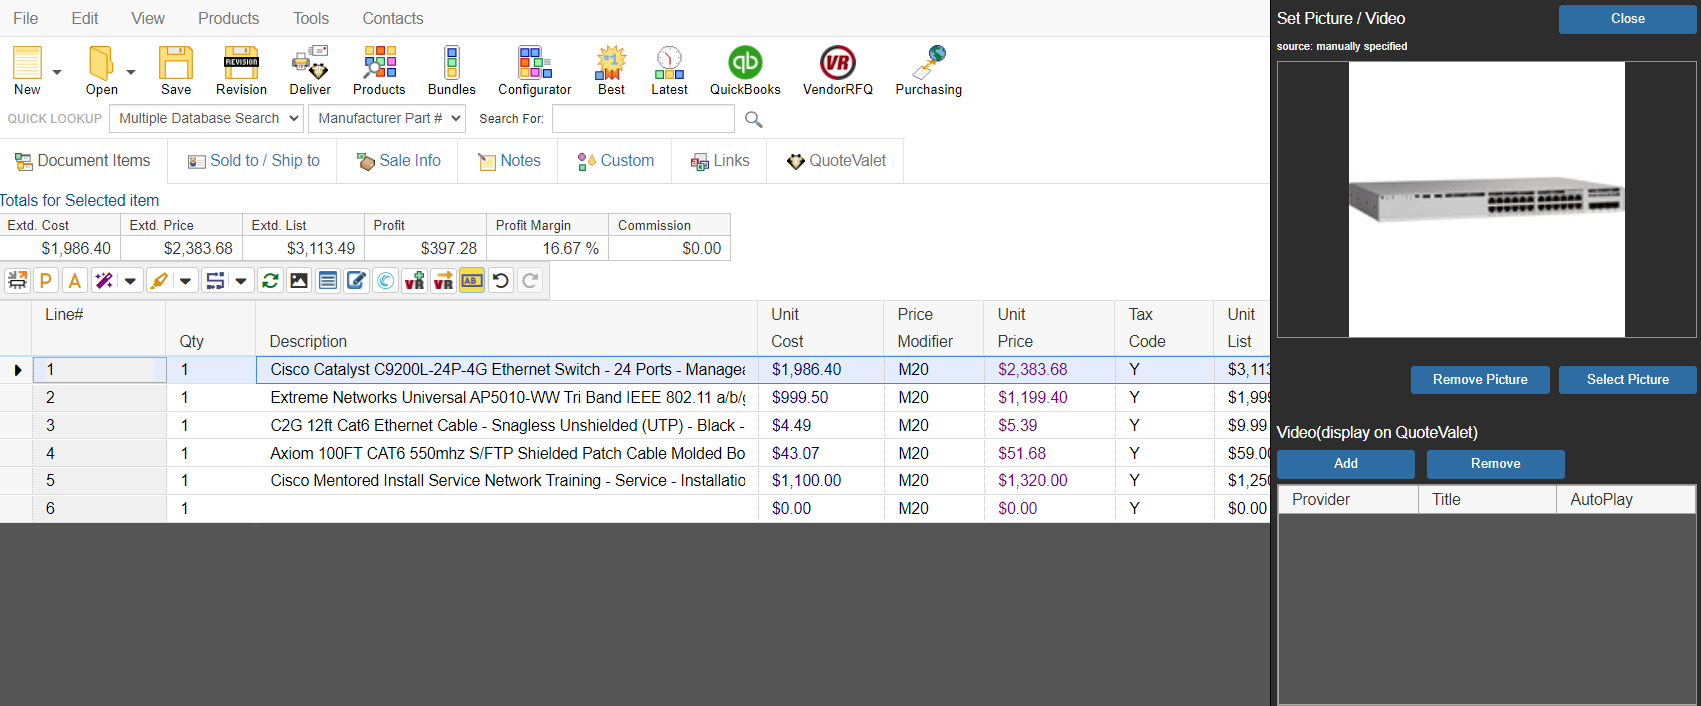
If a picture and/or video has not been added on the for an item through the edit product menu, you can manually associate a picture and/or video with a line item in the quote. There is a "Show/Hide Set Picture/Video Panel" button
This will display a new panel making it easy to see the current picture and associate a picture with the item. You can also drag a picture file onto the [Select Picture] button.
To set a default picture for an item, visit the Editing Products topic. |
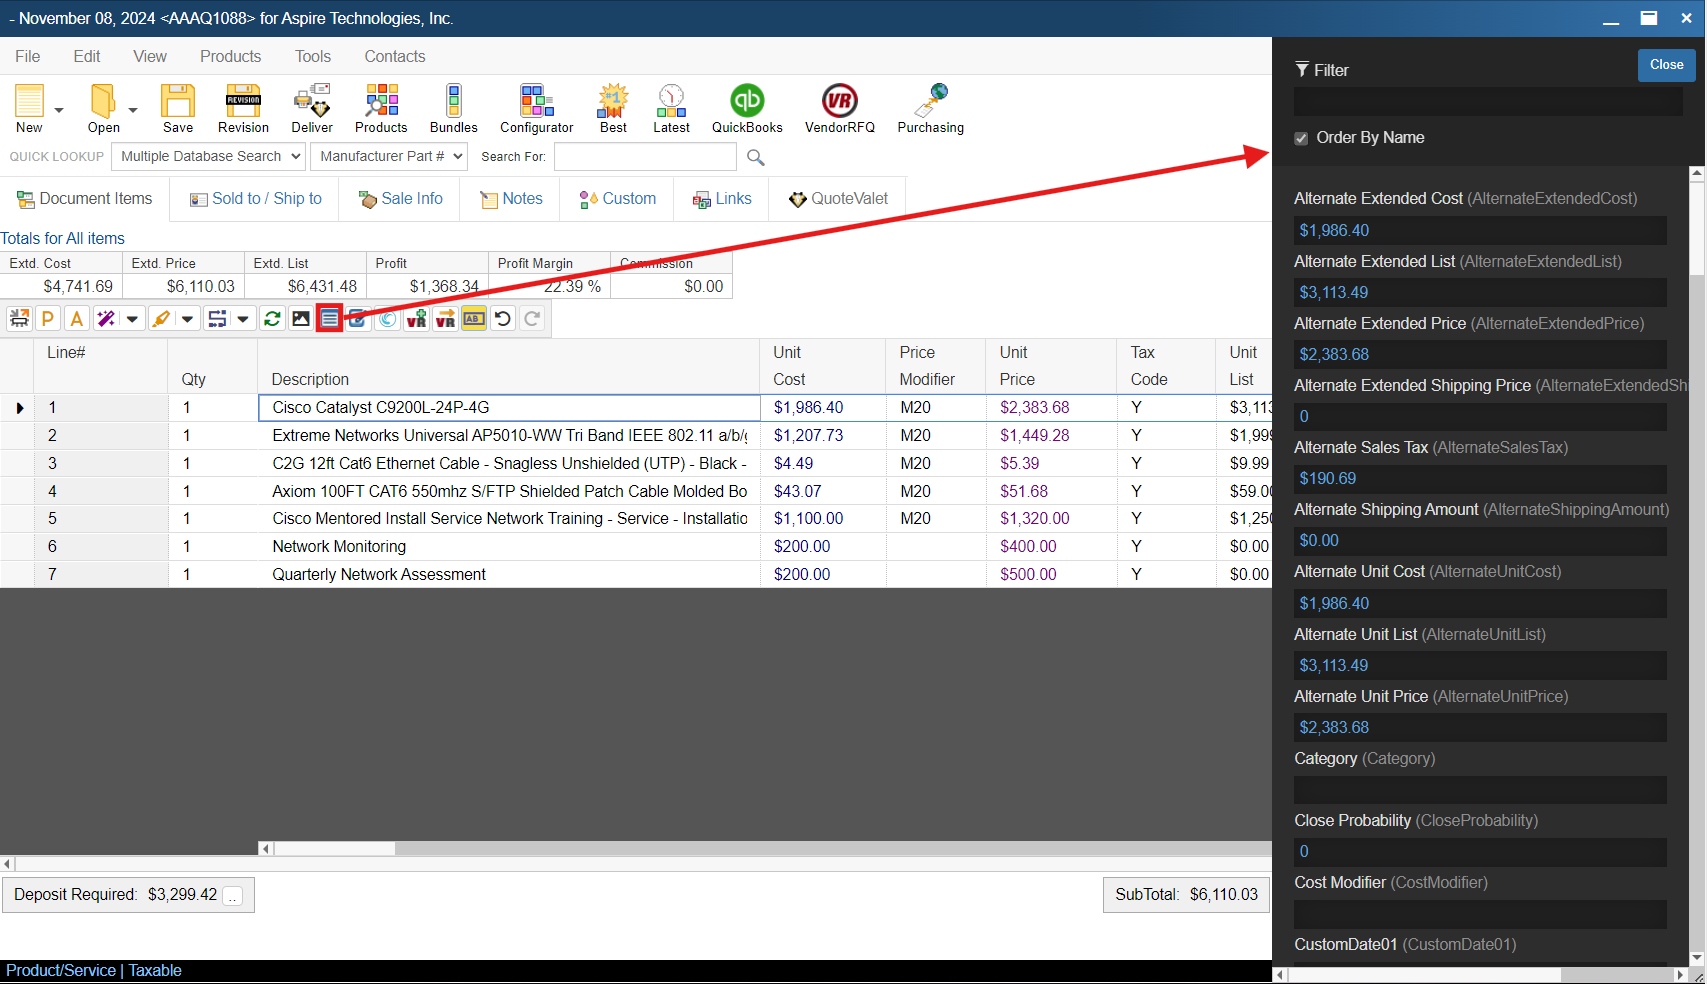
Clicking on the Toggle Item Panel icon with an item selected will open a menu on the right side of the screen where you can view all information associated with the particular item. You can choose to order by name or use the filter to drill down to the specific attribute you are looking for. Any changes you make to those fields will be reflected in the document workbook.
|
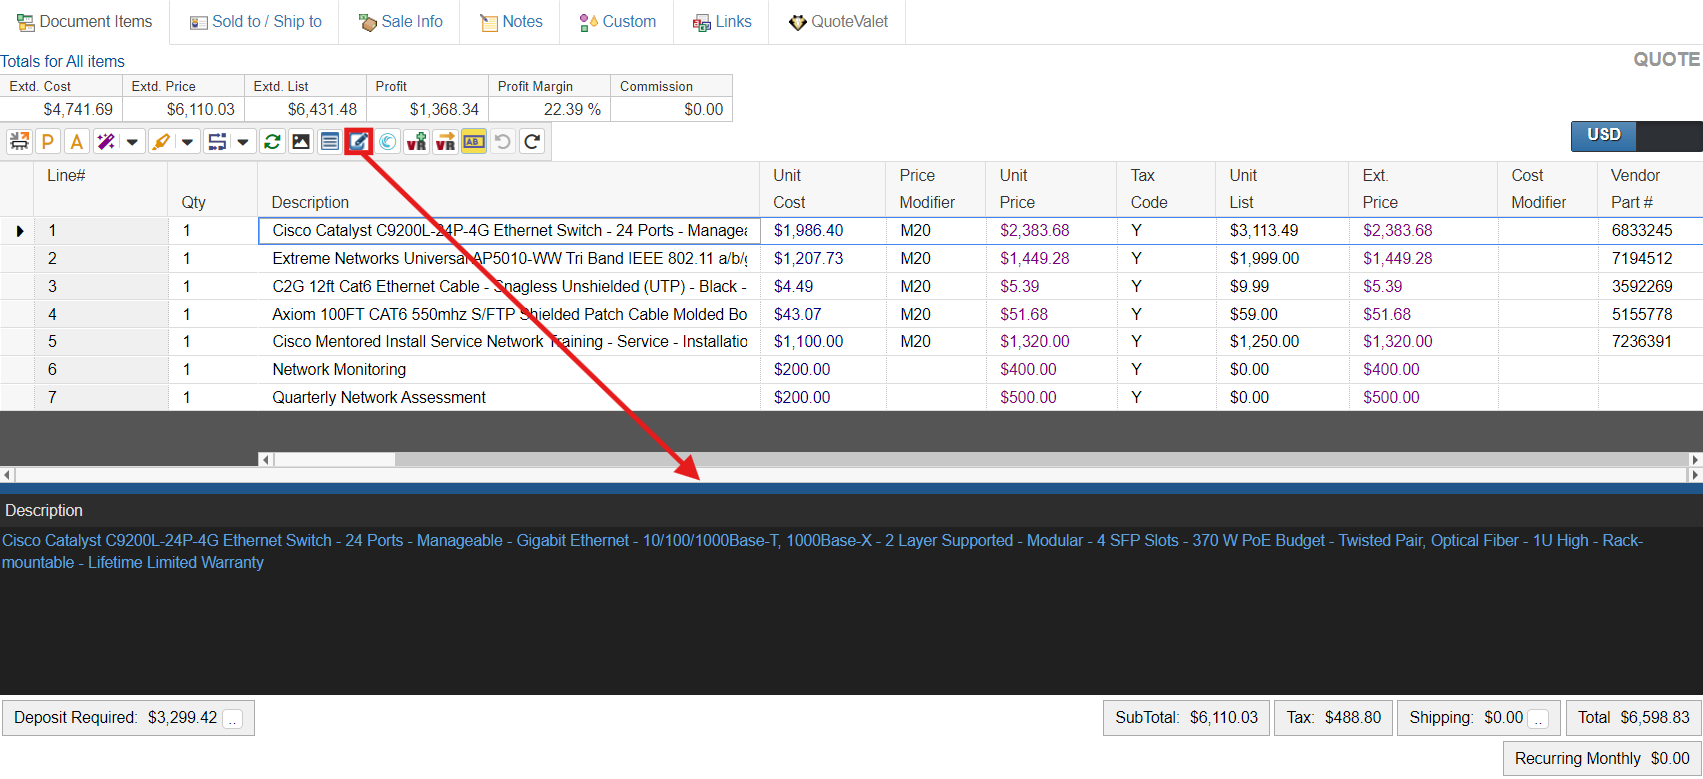
Clicking on the Toggle Description Panel with an item selected will open the expanded description at the bottom of the page. From here you can review or edit the items description.
|
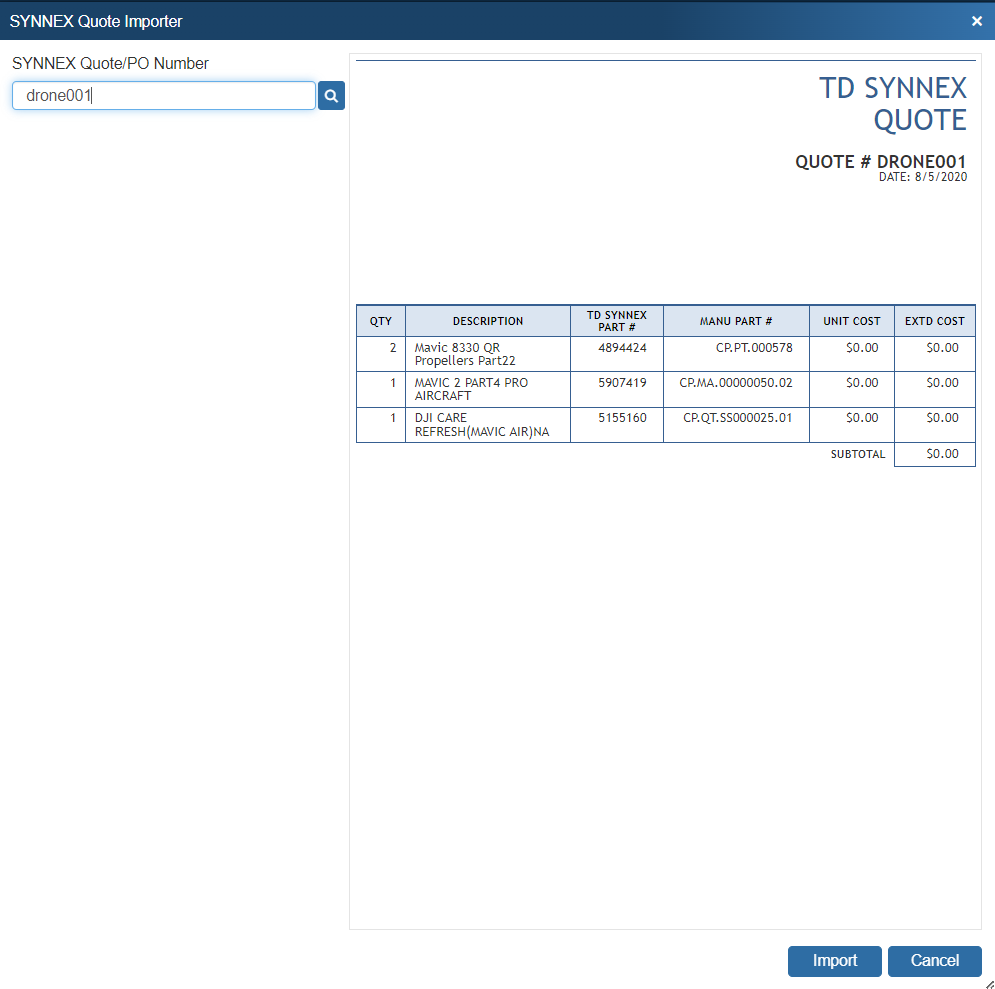
In addition to Paste Special, there is another way to import a TD SYNNEX quote into QuoteWerks. The TD SYNNEX Quote Importer feature allows you to build the quote in TD SYNNEX, and then import the quote with all the line item information directly into QuoteWerks to take advantage of the Etilize functionality, QuoteWerks Layouts, and much more. This feature is available for US and Canadian TD SYNNEX users.
When you click on the
Once found, you can import all the quote details into the QuoteWerks quote by clicking on the [Import] button on the selected or open quote.
Setup the TD SYNNEX Quote Importer To use this feature, you simply need to have TDSynnex set up as one of your distributors in the real-time module. If that has already been done, you can start using this feature right away. Import TD SYNNEX Quote Number |
Add item to RFQ or invite more vendors to bid 
To add an item or items to an RFQ click on the Add item to RFQ or invite more vendors to bid button. This will prompt you to configure the RFQ and will be added to your RFQ list in VendorRFQ.
|
To view an item or items in Vendor RFQ, click on the View RFQ item in VendorRFQ. This will pull up the RFQ that this product is included in in VendorRFQ.
|
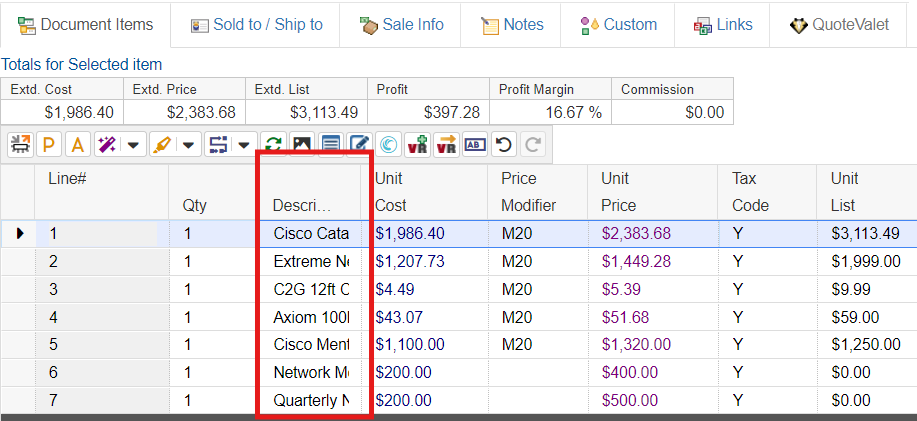
Clicking on the Toggle Large Text Boxes icon will expand fields in the document workbook. If the field has enough text so that it cannot reasonably be adjusted to all fit on the screen, the field will be expanded so that a large portion of the text is displayed.
Below is an example of the description column being too small to display all of the text in that field.
By hitting the
|
Clicking |



 , to the far left of the line item).




 = Identifies item as Parent Item
 = Identifies item as Child Item
 = Identifies item as both Parent and Child Item
