Required Items |

  
|
Required Items |
|
If you have items that require other items to be quoted with them, you may want to use the required items feature to ensure all necessary items are added to the quote.
Setting Up Required Items
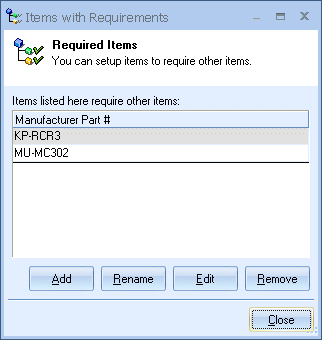
Setting up required items involves creating an entry for the item that has required items (we will refer to that item as the master item), and then listing the required items under that entry. Select the Products -> Required Items menu to display the Required Items window:
Add
Click on the [Add] button to select the master item. The master item is item that will have other required items. The Product Lookup window will be displayed so that you can find the master item, select it, and click on the [Select] button to add it to Items with Requirements list.
Adding Items from Etilize
Items from Etilize can be used in Required Items by searching for the items in Etilize or selecting them from the "My Favorites" folder under the Etilize Product Source. When adding items to a Required Item from Etilize, it is important to select the vendor first before adding the item to the Required Item. If the vendor is not selected, QuoteWerks will automatically use the first vendor available for that item when it's added to the document from the Required Item. Additionally, the Real-time pricing and availability will be updated for the item when it is added to the document.
Rename
If the part number of the master item you selected ever changes in the product database, you can use the [Rename] button on this window to make the needed adjustment the master item.
Remove
To remove an item with requirements, select the item and click on the [Remove] button.
Note: The Items with Requirements window can be resized. The last size and location will be remembered (per user) for the next time. |
Edit
To specify which items are required by the master item, select it, and click on the [Edit] button. The Required Items window will then appear:
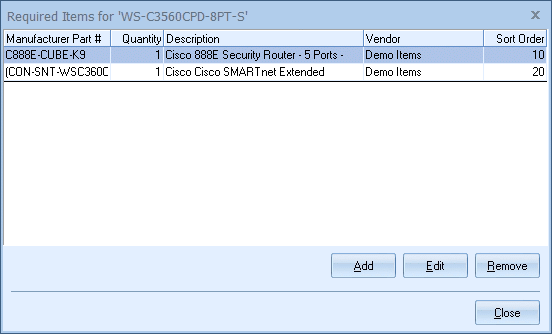
Click on the [Add] button to add the required items for the master item. The Product Lookup window will be displayed so that you can select items that are required by the master item. Once you have selected the item(s), click on the [Select] button to add the item(s) to the Required Items for Master Item window.
Required Item Properties
As you add items to the list, the Required Item Properties window will appear:
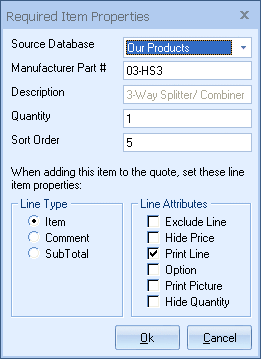
The Required Item Properties window gives you more control over how that required item will be added to the quote.
The ‘Source Database’ will pre-fill with the vendor information from which the item was originally selected. You can change the Source Database by clicking on the drop down menu and selecting another vendor source database.
The “Manufacturer Part #” is the part number of the selected item.
The “Description” is retrieved from the part number definition in the product database.
The Quantity field allows you to set a quantity other than the default quantity of 1.
The sort code allows you to define the order in which the selection container items appear when they are added to your quote.
The Line Type and Line Attributes settings allow you to further specify the properties of the item when it is added to the quote. See Working with Document Items for details on line types. Once you have set the properties and attributes for the item click on the [OK] button and the item selected will appear in the required items window.
To modify the properties of an item once you have created the list of required items, select the item to be modified, and click on the [Edit] button to change its properties. Click on the [Remove] button to remove it from the list of required items.
Note: Items used for Required Items must have a unique manufacturer part number. |
Using the Required Items Feature
Whenever you add an item to the quote that has a list of required items, the required items will automatically be added along with that item.
|