Once a quote is accepted by a customer, you can choose to convert the quote document to an order document. Converting a quote to an order is mostly done so that you can track information about your documents. Once you have converted a quote to an order, you can now track information about orders. Management reports can be created that will show only orders, and not quotes during the month of November as an example.
To convert a quote to an order, open the quote, and then select the File -> Convert to Order menu:

|
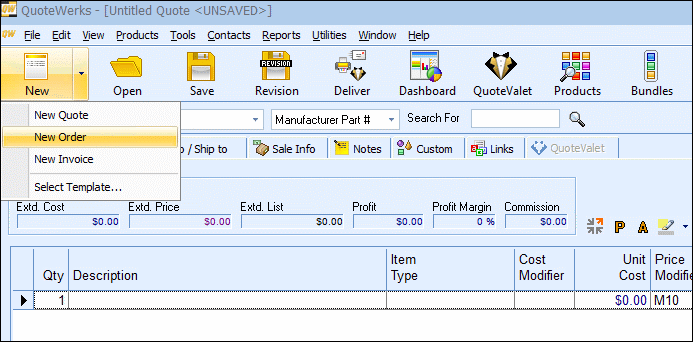
Users can also create new Order documents by clicking on the File-> New menu option or by clicking on the split-menu arrow and selecting the "New Order" option. If a user creates an order this way, the Convert to Order window will not appear since the document is being created as an order.

After you make this selection, QuoteWerks will issue the next available order number like AAAO1001 for example. The order number sequence is separate from the quote number sequence. See Quotes for further explanation of the AAAO1001 format.
When converting a quote to an order, the DocDate field on the Sale Info tab will be updated with the date of the conversion. If the quote was accepted through QuoteValet, the date of the acceptance will be used.
Allocate inventory for this Order
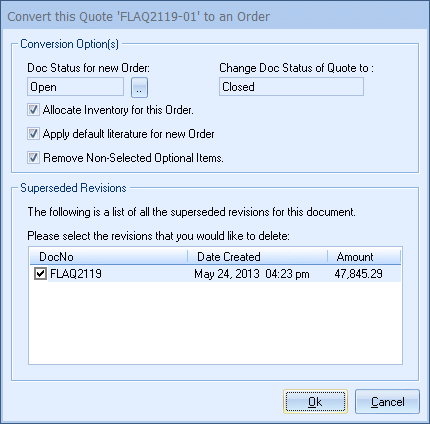
When converting the quote to an order, you will have the option to “Allocate Inventory for this Order”. If you check this checkbox, QuoteWerks will reduce the inventory count of the item as listed in the native product source by the appropriate quantity for each item in the order. This option can be defaulted on the Installation tab of the Tools -> Options menu. For information on how to set the inventory count, see the Availability field description in Setting Up Native Products and Services.
Apply default literature for new Order
You also have the option to "Apply default literature for new Order", which will add the default Order literature to the existing selections currently associated with the Quote. These defaults are set on the Documents tab of the Tools -> Options menu.
Remove Non-Selected Optional Items
If you have optional items on your quote that were not selected by the customer you can check the box to have them removed from your document.
Also, the “Convert this Quote to an Order” window will display the new status of the quote and the status of the New Order. Lastly, if you have any revisions of the quote, they will be displayed and you will have the option of deleting those revisions by putting a checkmark next to the Doc No. For more information on Document Status defaults and Orders, please see Setting Up QuoteWerks.
A Sales Order is a document that is used internally by your company to print cost and profit information about an order. Unlike quotes, orders, and invoices, a sales order does not have its own numbering sequence, and it is not a separate document from the order. A unique feature found in the sales order type of print layout is that when it is printed, it will “disassemble/expand” grouped bundles and grouped configurations. So if you have a grouped bundle on the quote with a group quantity of 3, and you have 4 line items in the bundle each with a quantity of 1, when the sales order is printed, there will be 4 line items on the quote each with a quantity of 3. QuoteWerks formats the data this way when printing a Sales Order print layout to prepare the data for presentation to your vendor. It will also not include comment type of line items from the order since it assumes that the comment lines were meant for your customer, not your vendor that you are purchasing the products from. To print a sales order, just open the order that you want to print a sales order for, and select File -> Print/E-mail/Deliver. On the File -> Print/E-mail/Deliver window, check the box next to the “Display all Layout types” checkbox. Then choose a Sales Order layout from the list and print it.
A Purchase Order is a document that is used internally by your company to purchase the items that your customer ordered. Unlike quotes, orders, and invoices, a purchase order does not have its own numbering sequence, and it is not a separate document from the order. To print a purchase order, just open the order that you want to print a purchase order(s) for, and select File -> Print/E-mail/Deliver. On the File -> Print/E-mail/Deliver window, check the box next to the “Display all Layout types” checkbox. Then choose a purchase order layout from the list and print it.
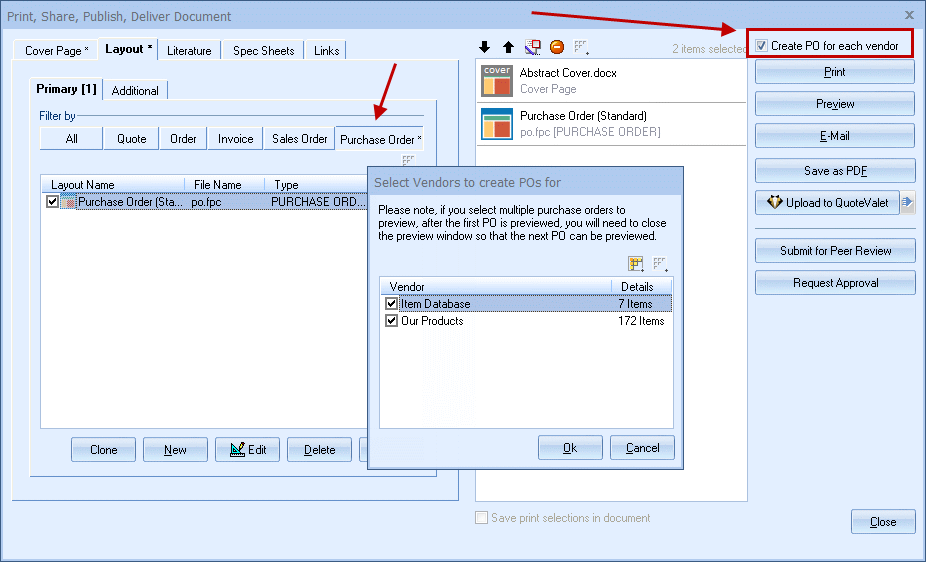
When you select a purchase order type of print layout, the “Create PO for each Vendor” checkbox will appear above the list of layouts:

If you check this box, QuoteWerks will look at each line item in your document, and create a separate purchase order for each unique vendor name as it appears in the vendor column of the quote. QuoteWerks will look in the vendor list (Utilities -> Vendor Maintenance menu) for that vendor name to obtain the vendors address, phone number, etc. and place it on the purchase order.
To create the PO’s you will need to click on the [Print], [Preview], or [E-Mail] buttons.
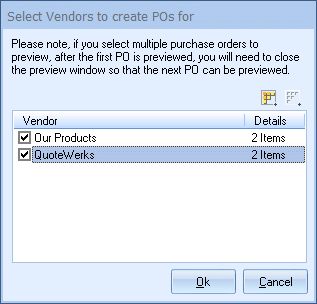
QuoteWerks will then launch the “Select Vendors to create PO’s for” window:

This window displays a list of Vendors on the Order and will allow you to select the Vendor(s) that you want to create PO’s for. Finally, click on the [Ok] button to create the purchase order for the first Vendor.
|
When printing each purchase order, QuoteWerks will append an alphabetically sequenced letter to the end of the order number to create each purchase order number. If you do not want QuoteWerks to automatically create that purchase order Number, you can remove the DocumentHeadersDocNo field from the purchase order print layout, and insert a dialog field instead. When you print the purchase order, the dialog field will ask you to enter the purchase order number that you want on the purchase order. For more details on creating Dialog Fields, please see Printing and Customizing Document Layouts.
When using the “Create PO for each Vendor” feature, please note that the totaling values have been designed to return a zero value. The line items and their price extensions will print correctly; there will just be no total for all the items on the Purchase Order. Also, when using this feature, the cover page macros may not function as you may expect. This feature cannot be used in conjunction with the [FaxRush] button on the File -> Print/E-mail/Deliver window. To fax these multiple purchase orders using FaxRush, click on the [Print] button instead, and choose “FaxRush Client” as the printer.
If you do not check the “Create PO for each Vendor” checkbox, and there are line items for more than 1 vendor in the document, all of the vendors line items will be printed in the purchase order, and no vendor address information will be printed on the purchase order.