When importing products into the QuoteWerks Native Product Database you have the option to create folders and subfolders to better organize your product catalog.
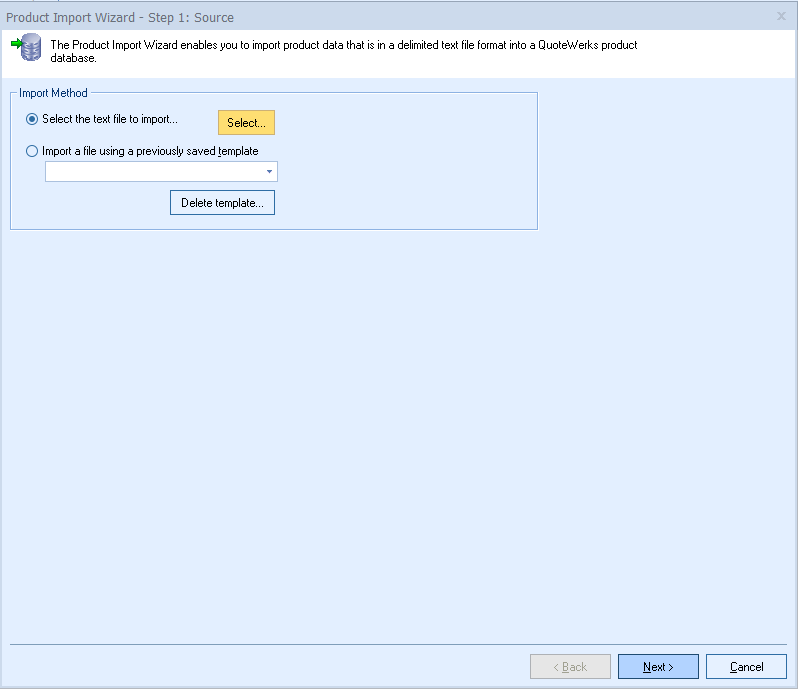
1. Navigate to the Product Import Wizard via the Products drop down menu.

2. Next choose the Select... button to choose your file for import. This file should be in a .csv or .txt file format.
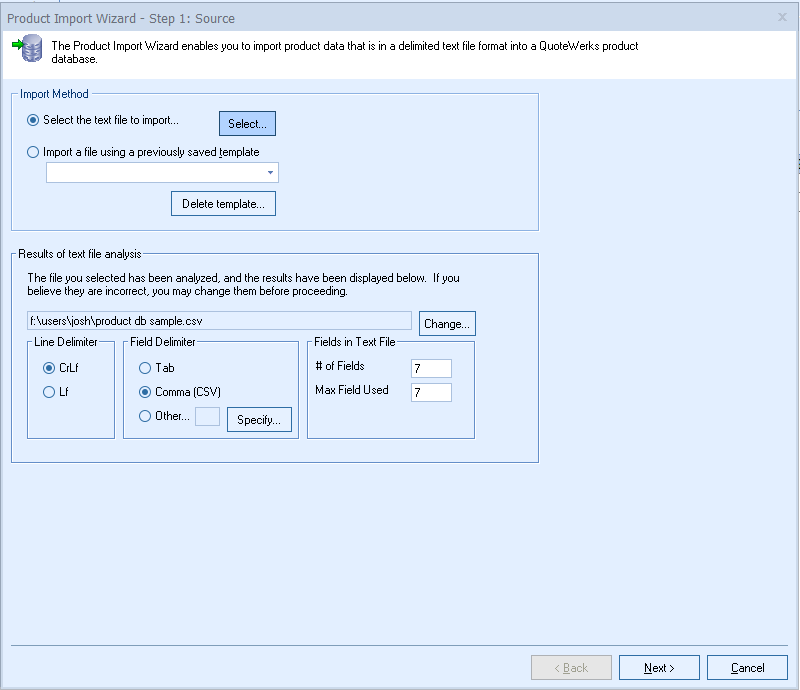
3. Once imported the QuoteWerks system will analyze the file and automatically detect it's settings. This does not need to be adjusted. Select Next to move on to the next step in the process.
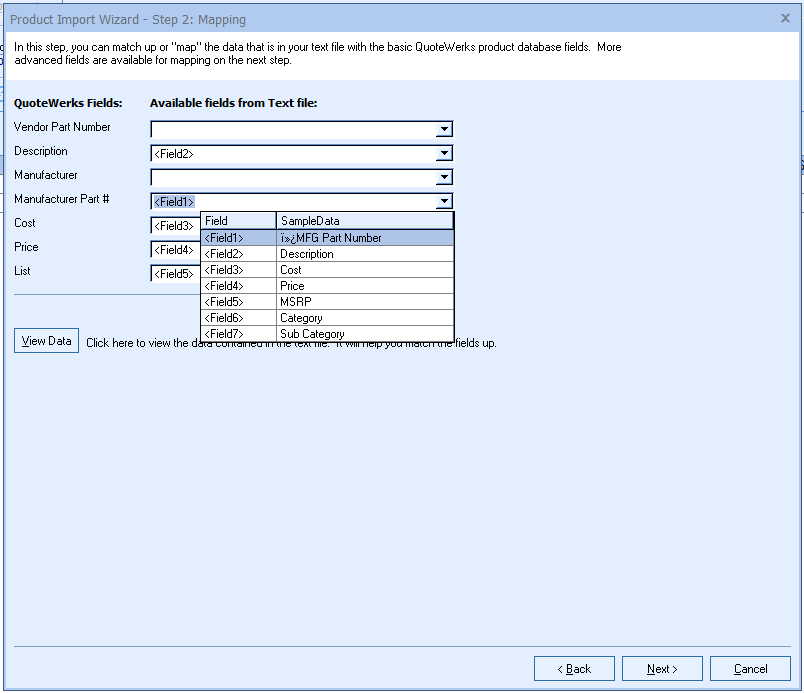
4. Next you will do some basic mapping for the most common fields in QuoteWerks. It is required to map the Manufacturer Part # field, but you should include as many as possible before proceeding to advanced mapping. Once complete, hit Next.
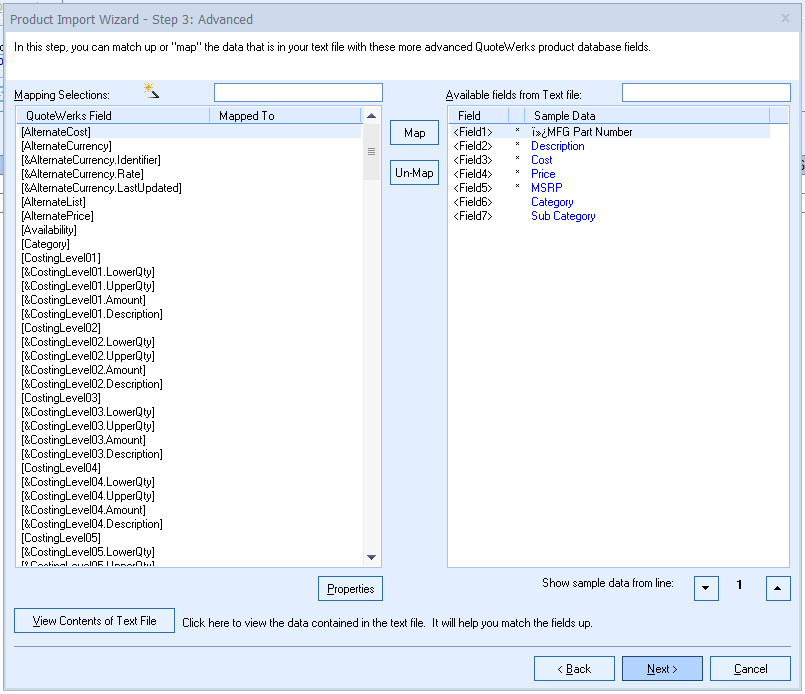
5. The Advanced Mapping window will appear. This is where you can map any additional fields you would like with the QuoteWerks Fields showing on the left and the column headers from your imported document on the right. Note that in this example all fields are mapped except for the "Category" and "Sub Category" fields. These are the fields we will use in this example to demonstrate how to create folders and subfolders with Category being our top level folder and Sub Categories being nested within it.
6. Next you will want to map the [&FolderName] field to the Category (<Field 6>) field by selecting [&FolderName] on the left, Category (<Field 6>) on the right and hitting the "Map" button. This by itself will create a folder based on our Category field.
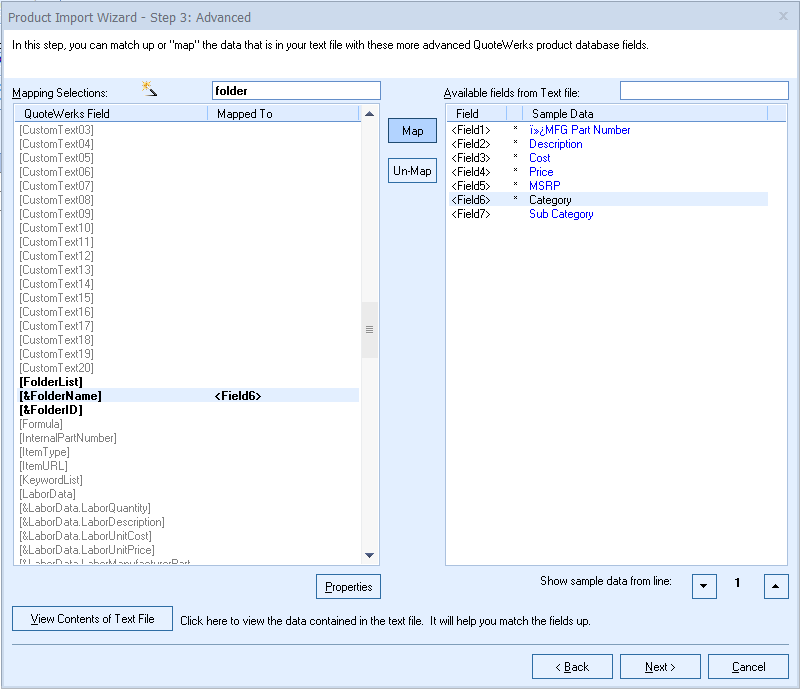
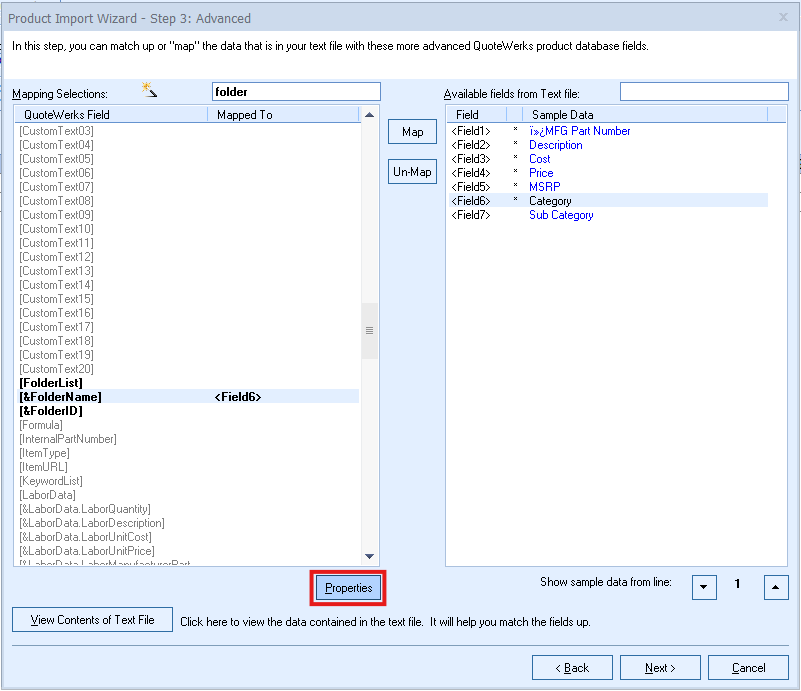
7. To create a subfolder you should select the "Properties" button towards the bottom of the window.
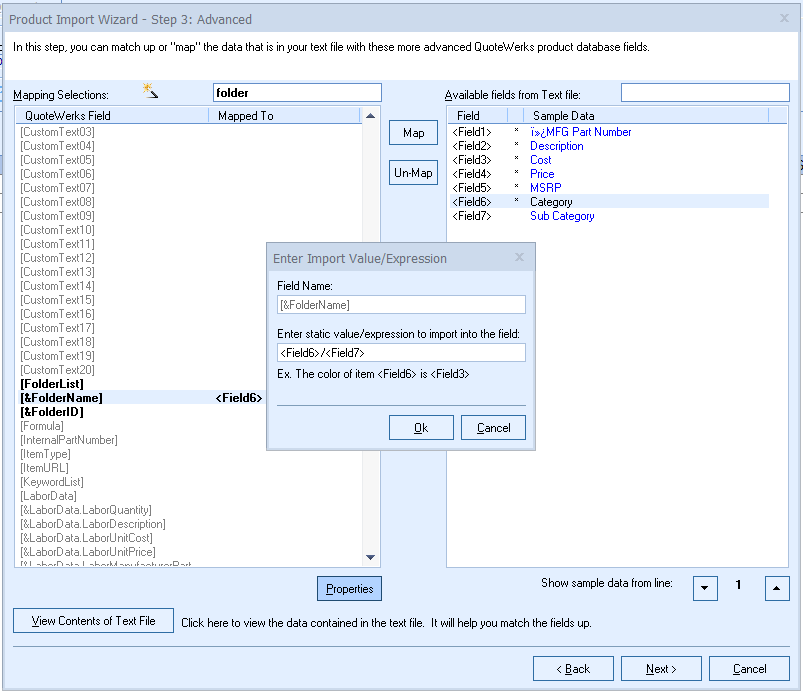
8. This opens the "Enter Import Value/Expression" window. Notice that in the "Enter static value/expression to import into the field" text box it says <Field6>/<Field7>. This indicates that we want our Field 6 header, in this case "Category," to be the top level folder and Field 7, in this case "Sub Category", to be our subfolder. Once complete, hit OK.
9. Hitting Next will bring you to Step 4 of the Wizard: Destination. Here you will choose the Database you would like to import the products into. Typically you will want set "Start import at row" to 2 as row 1 is often your headers. This excludes the header row from being imported and can avoid having to remove the header row as a product in your database.
For the purposes of creating folders and subfolders we will want to select "Create product folders."
You also have the option to "Remove leading & trailing spaces from all field data." When importing data exported from older database systems the data is often “padded” with space characters at the end of the actual data value. You can use this option to “trim” or remove these extra spaces.
You will also want to select you "Import Mode." These options are explained in detail below.
When you have made your selections hit "Next."
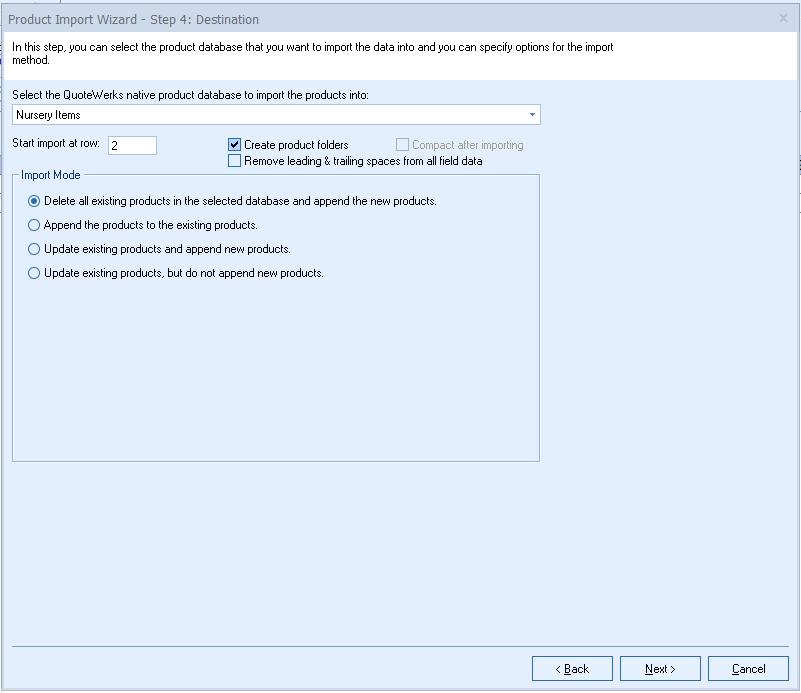
Import Mode Options:
Delete all existing products in the selected database and append the new products
Select this option to delete all the existing products in the product database before beginning the import of the new products. This feature is used when you receive a product database update every month, and you want to remove the old product information, and retain only the newest product information. Keep in mind that if you have made any changes to the products that already exist in the database, deleting them will cause you to lose these changes. If you use the product folder features, the folder information will be lost.
Append the products to the existing products
Select this option to only add the products from the text file into the product database. It does not check to see if the products that you are adding already exist. If the product already exists, you will have duplicates.
Update existing products and append new products
Select this option to update products that already exist in the database, and add the products that it does not find in the database. Select the column in the text file, and the database field that should be used to identify the matching products. You can also select which of the mapped fields you would like to update. This allows you to update only the price for example of existing products, for products that do not exist, they will be added, and all of their fields will be updated. This mode is particularly useful in cases where you have received a list from a manufacturer that contains all 6000 of their products and pricing. You have previously imported all 6000 of these products into your QuoteWerks product database. Now, 3 months later the manufacturer provides you with an updated list of their products and pricing and now they offer 6500 products. Using this feature, you can update the prices of the existing 6000 products in your QuoteWerks product database and you can add the 500 new products now contained in the update manufacturer price list.
Update existing products, but do not append new products
Select this option to update products that already exist in the database. If a product does not exist in the database, then do not add it. Select the column in the text file, and the database field that should be used to identify the matching products. You can also select which of the mapped fields you would like to update. This allows you to (for example) update only the price field of existing products. This mode is particularly useful in cases where you may receive a list from a manufacturer that contains all 6000 of their products and pricing. However you may only sell 1000 of their products and therefore you only have these 1000 products listed in your QuoteWerks product database. Using this feature, you can update the prices of your 1000 products.
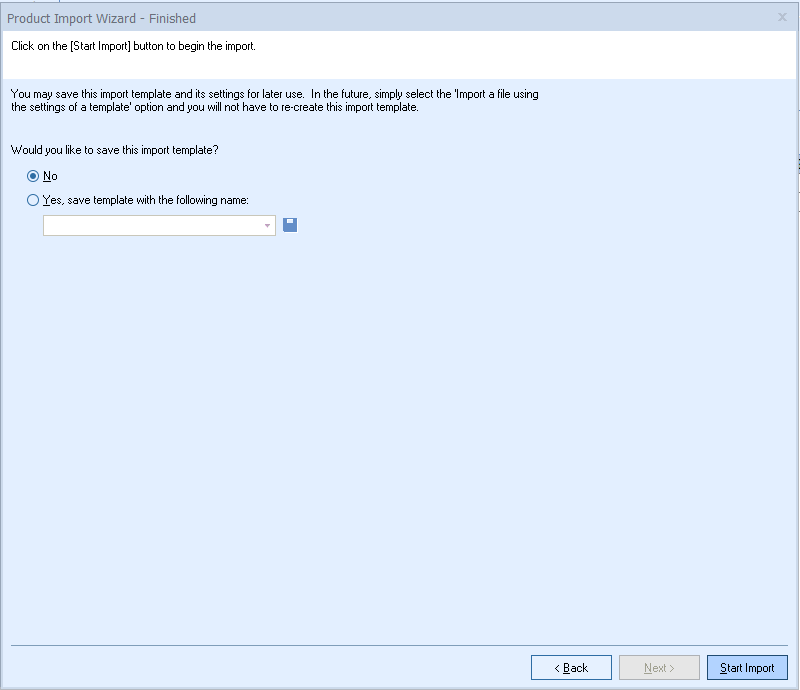
10. You will be prompted as to whether or not you would like to save this import as a template which could save you time during future imports by using the settings we configured while moving through the product import process. This is a great option if you expect to import price lists with the same file format and headers multiple times.
Once you have made your selection, hit "Start Import."
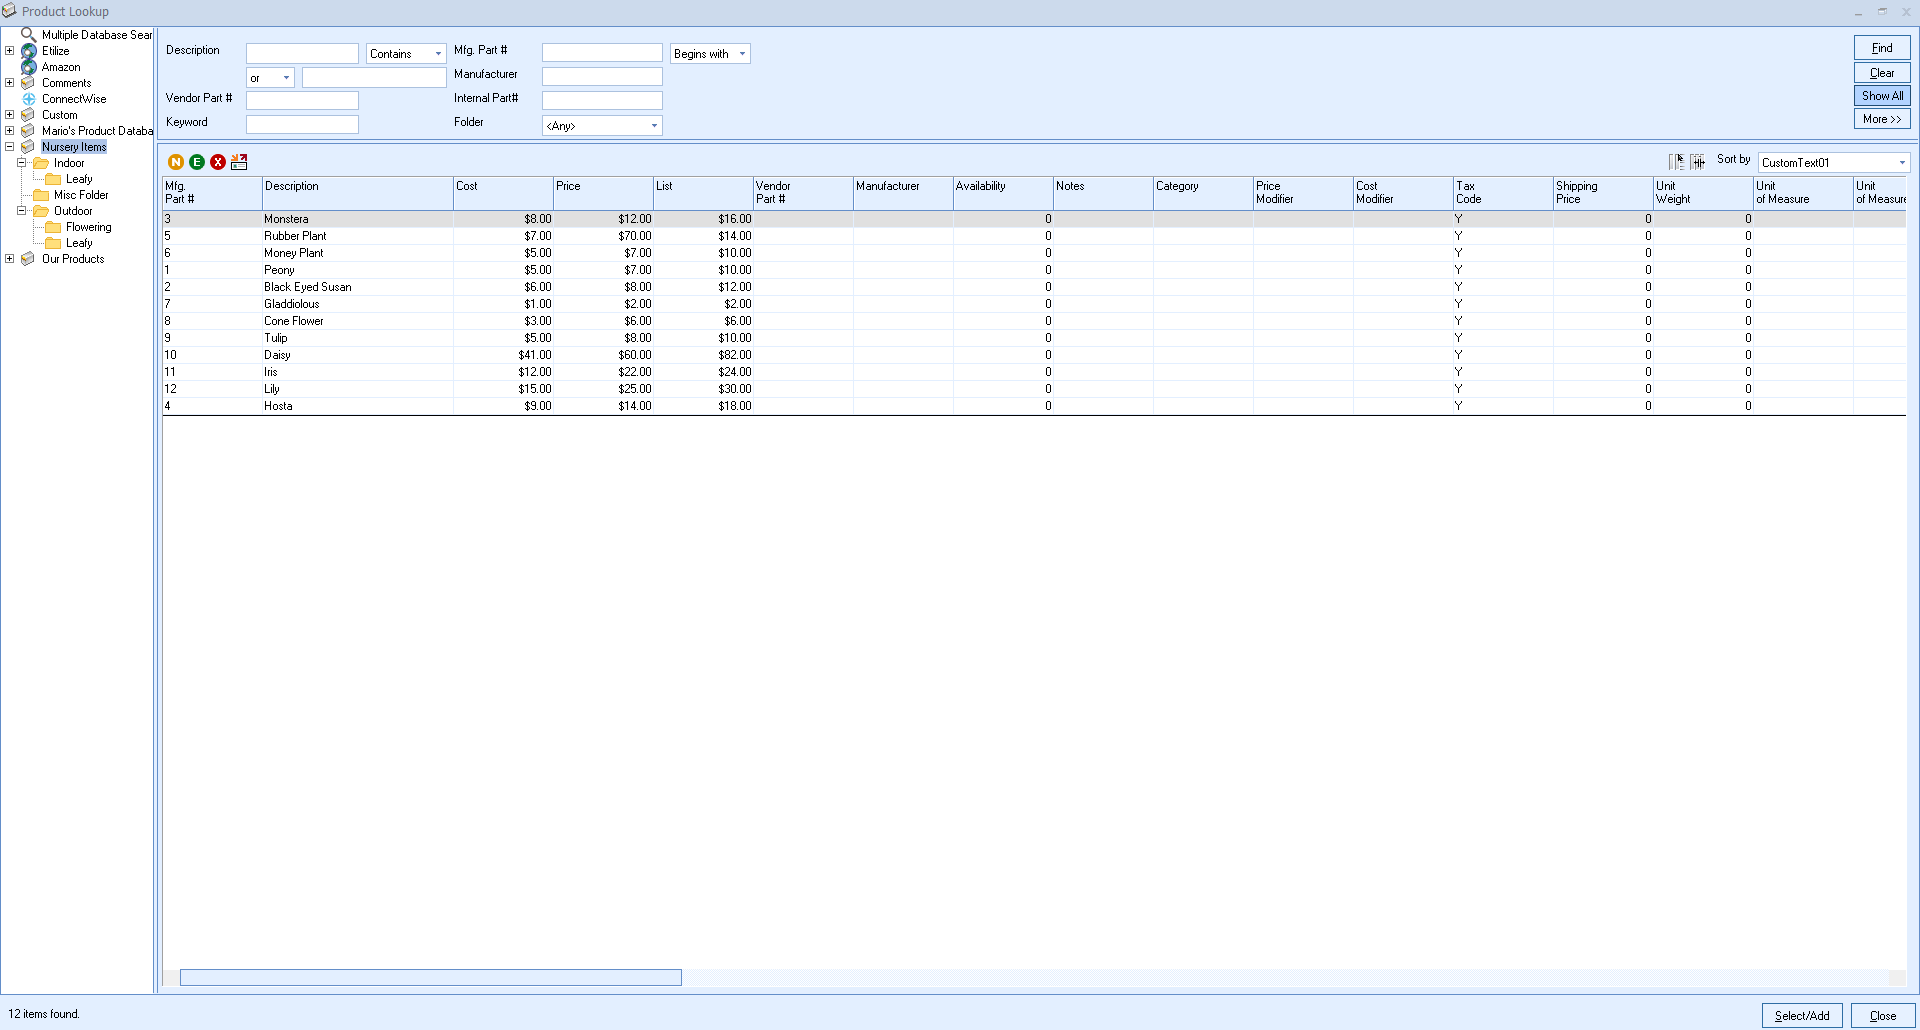
11. To confirm the import process completed successfully you can open the Product Lookup Window by selecting the Product icon on the standard tool bar or by navigating to the Product dropdown menu and selecting "Lookup..."
You will notice below that our "Nursery Items" product database has been created and it includes a folder for indoor and outdoor and subfolders for flowering and leafy. This matches our field/header organization where Field 6 is "Category" (folder) and Field 7 is "Sub Category" (subfolder).